FREE DELIVERY ABOVE $60

Posted on Leave a reply

Cream scones vs. butter scones

Cream scones vs. butter scones

By: izzah zainal | February 19, 2025

Imagine wandering into the kitchen on a chilly weekend morning, craving your favorite cream scones. You’re ready to bake and excited for something warm and sweet. You pull out your go-to recipe, gather your flour and sugar, then open the fridge only to gasp audibly. There’s no heavy cream! Breathe. Your scone dreams aren’t crushed; you don’t need to abandon your beloved recipe. There’s a simple substitution that will allow you to make delightful, ultra-tender scones without cream.

Swap butter and milk for heavy cream in any basic scone recipe, so you can always bake these classic treats — no matter what kind of dairy is in your fridge.

Cream vs. butter and milk

If you’re a person who faithfully plans baking ahead and always has the necessary ingredients on hand, this substitution is still worth learning. Why? Because there are some key differences between cream scones and butter scones. The ability to convert from one to the other allows you to make a batch with the perfect texture and appearance.We’ll help you decide which kind of scone is just right for your occasion.
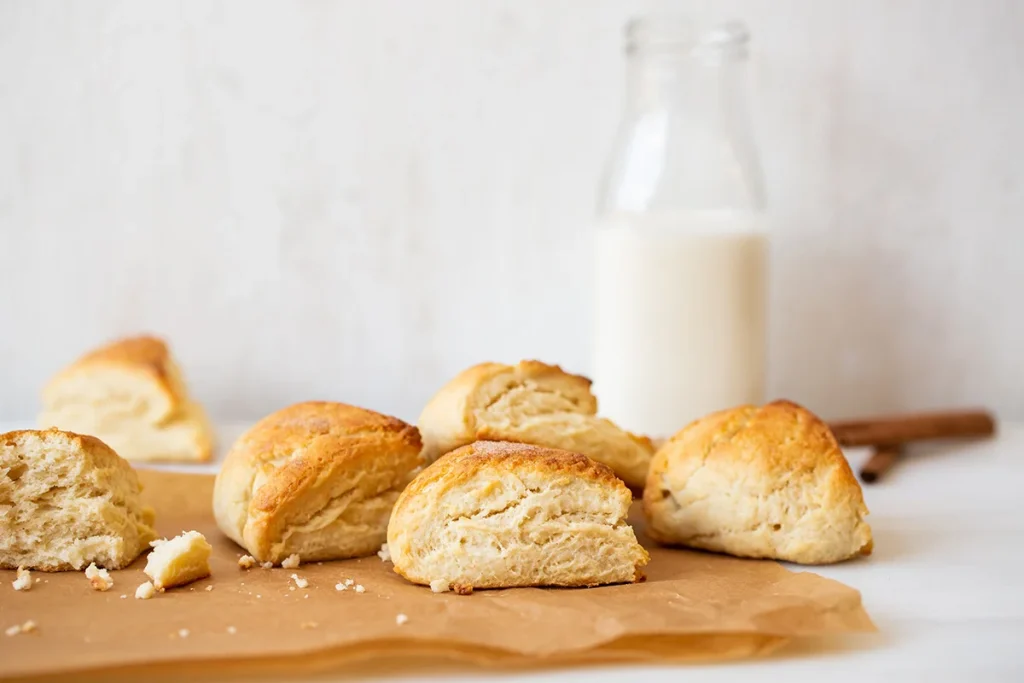
Cream scones 101

Using heavy cream as a base, cream scones can feel like a morning indulgence.

Texture: Ultra-tender and cake-like, they’re softer than butter-based scones.

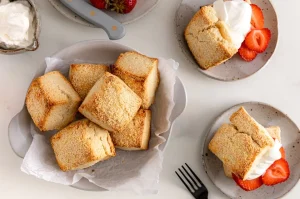
Best for: Enjoying as is or with a cup of coffee or tea; can also be dressed up as shortcake and served alongside fruit. Cream scones’ delicate texture is also just right for highlighting flavors like cardamom, cinnamon, espresso powder, and more.

Reason to love them: They’re quick and easy to make and don’t require working the fat into the dry ingredients.
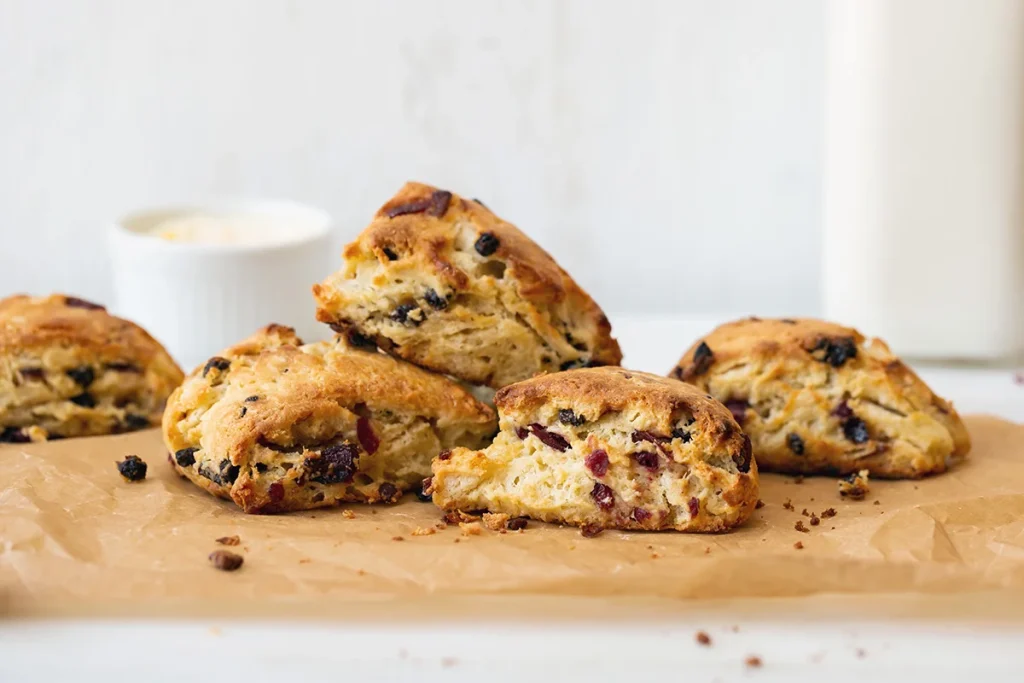
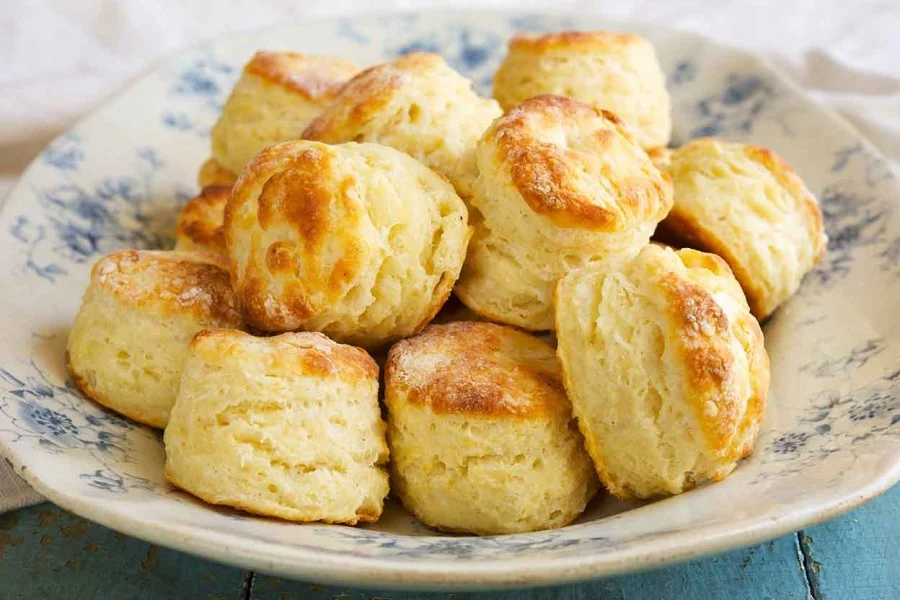
 

Butter scones 101

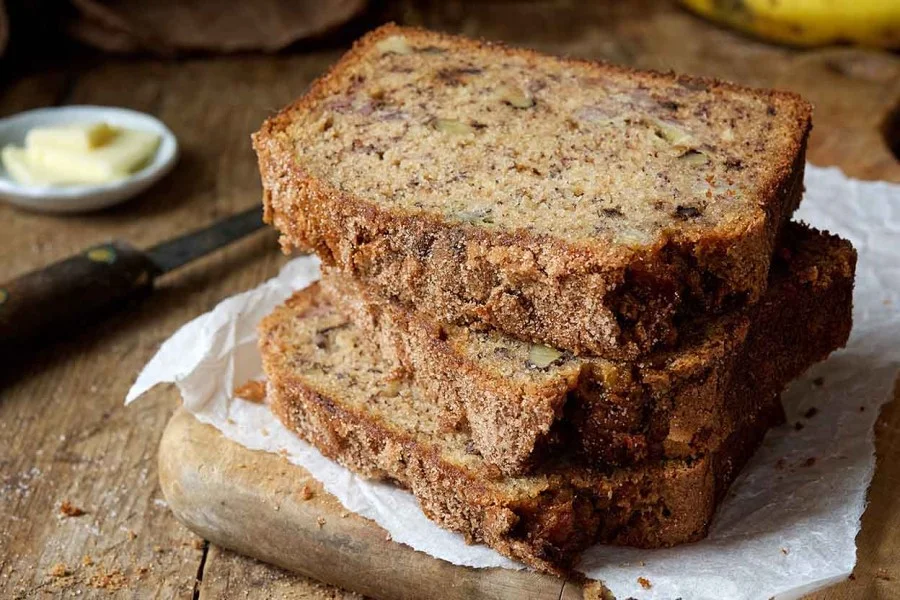
Classic and timeless, butter-based scones can be hearty and delightful.

Texture: Layered, usually with craggy, crisp edges and sometimes slightly dry (while still pleasant). Overall, butter scones are sturdier than cream scones.

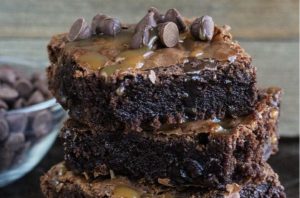
Best for: Splitting and topping with jam, butter, or cream. They can hold up to heavy or large mix-ins like chocolate chunks, roughly chopped nuts, or large dried fruit.

Reason to love them: They only require ingredients you’re likely to have on hand so you can make them at a moment’s notice.

Bottom line

Cream scones or butter scones? With our easy substitution, you’ll be able to convert back and forth based on what you’re looking for (or what’s in your fridge at the moment).

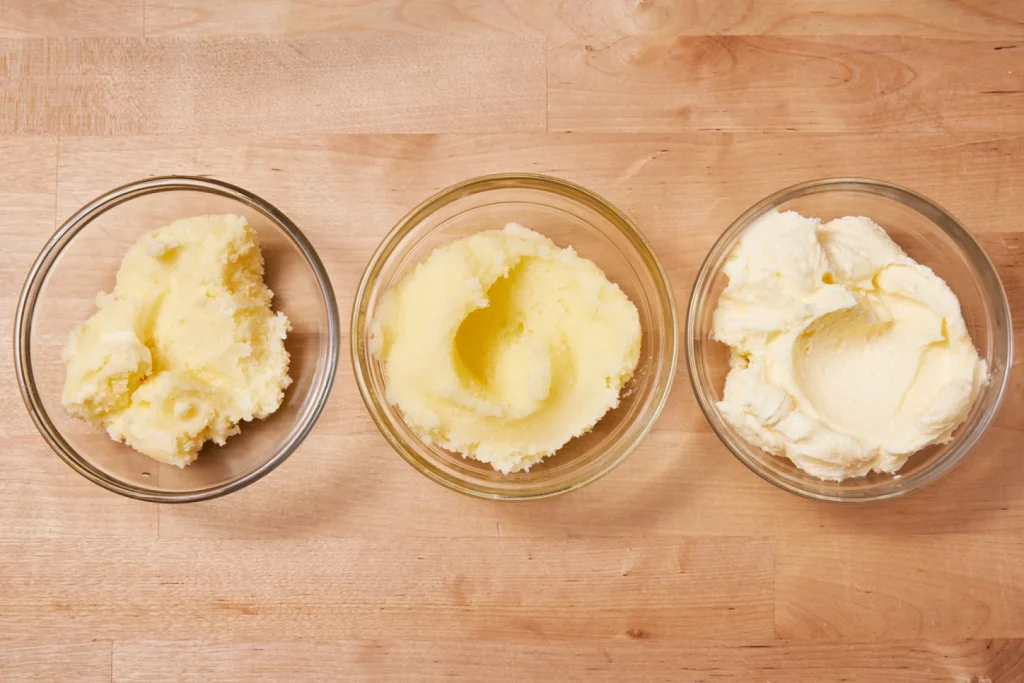
The substitution ratio

Are you ready for the ultimate conversion? Replace 1 cup (227g) of heavy cream or whipping cream with 1/2 cup (113g) of butter and 1/2 cup (113g) of milk. If your recipe doesn’t call for a full cup of heavy cream, scale down the amount of butter and milk that’s used accordingly. This ratio also works if you’d like to go in the other direction: You can replace the butter and milk in your recipe with heavy cream, basically using the same approach. There are just a few key points about converting in each direction that you’ll want to note before diving in.

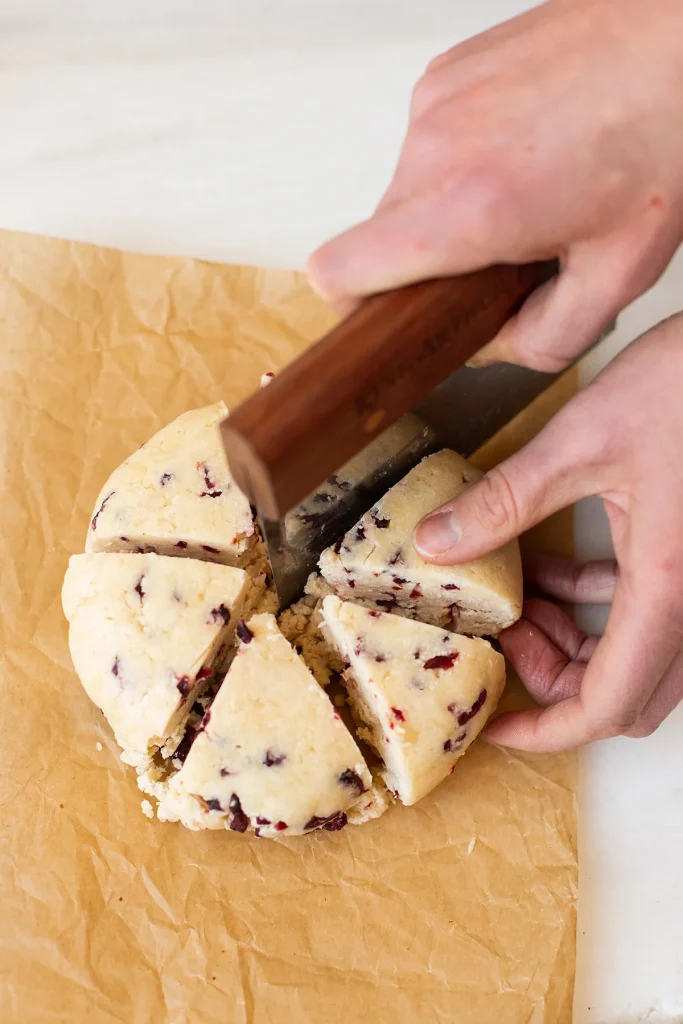
From cream to butter and milk

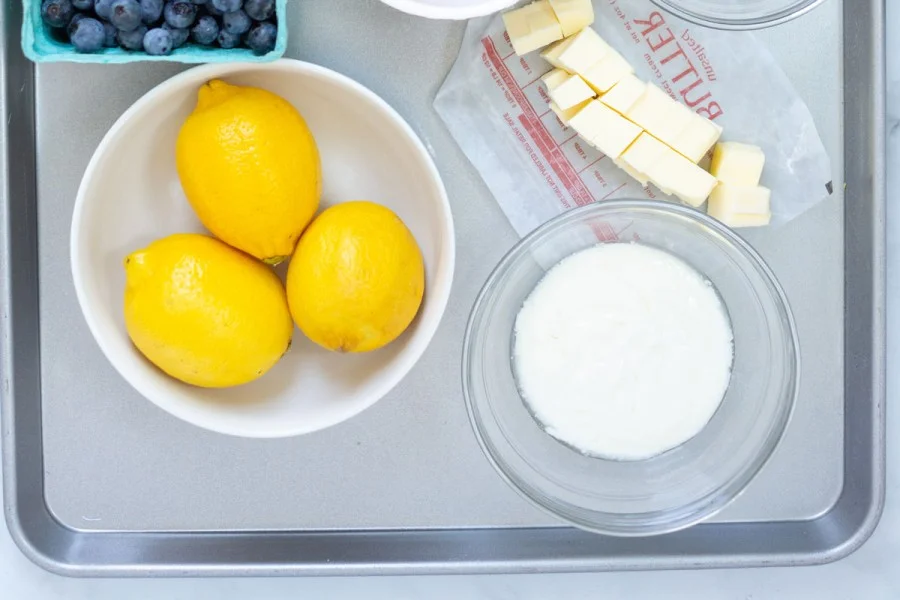
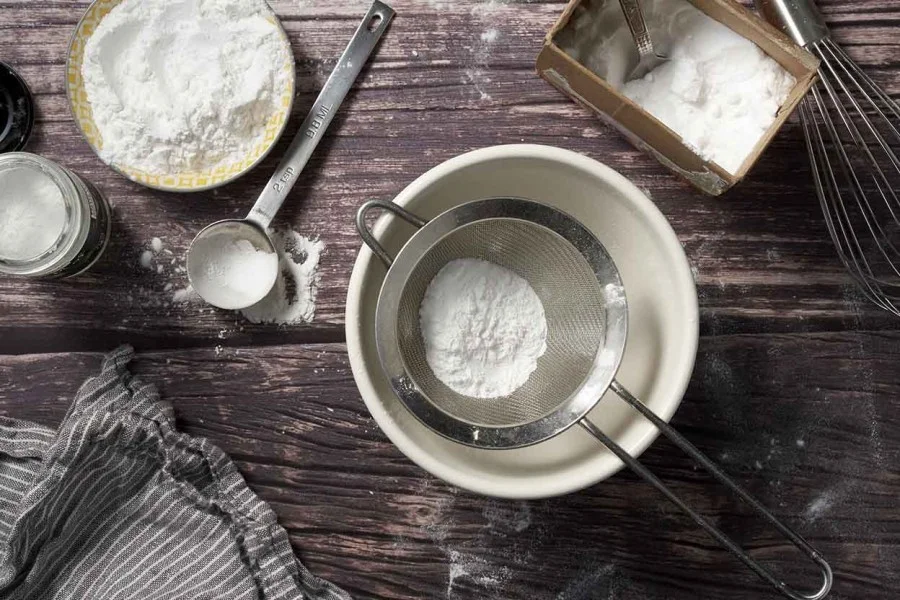
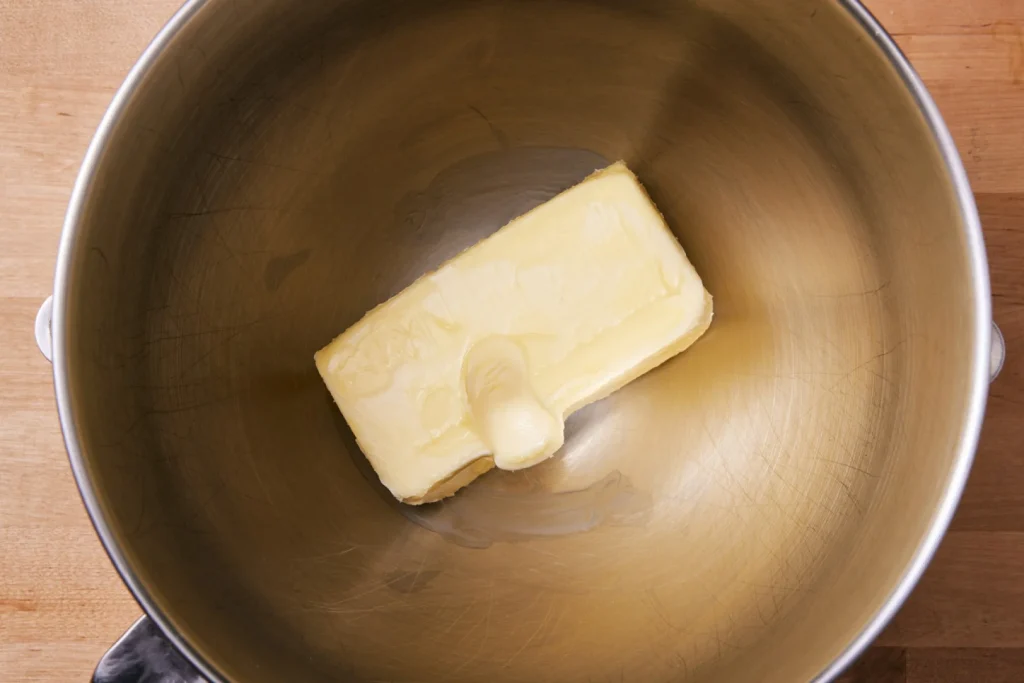
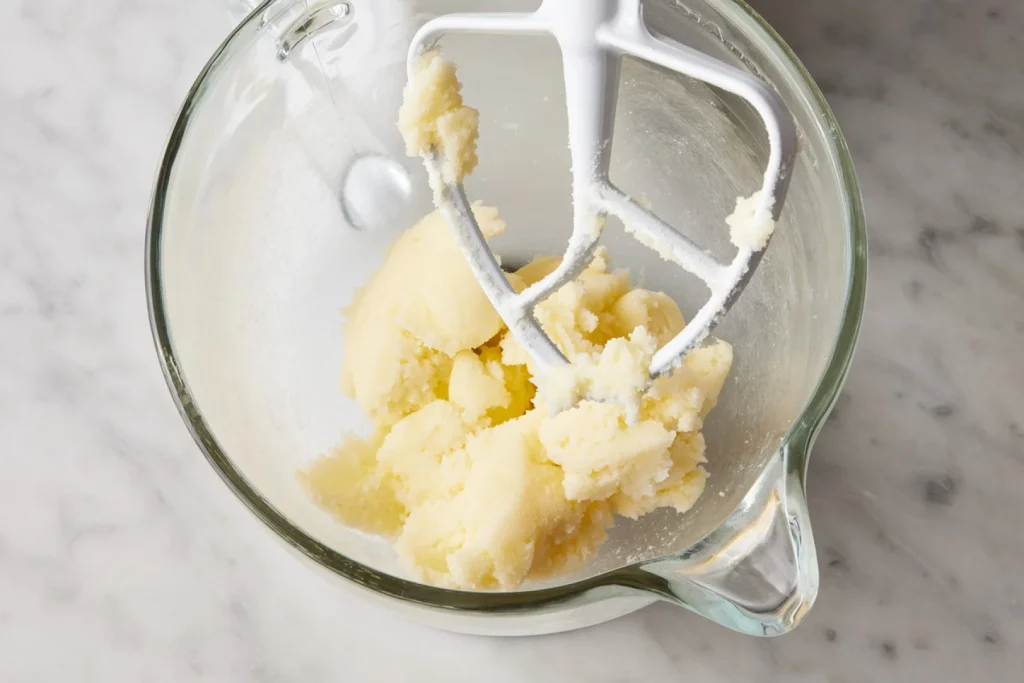
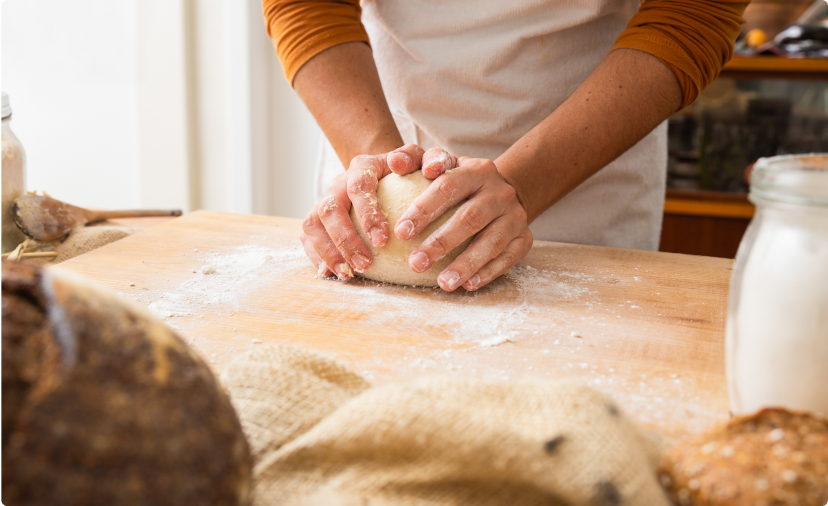
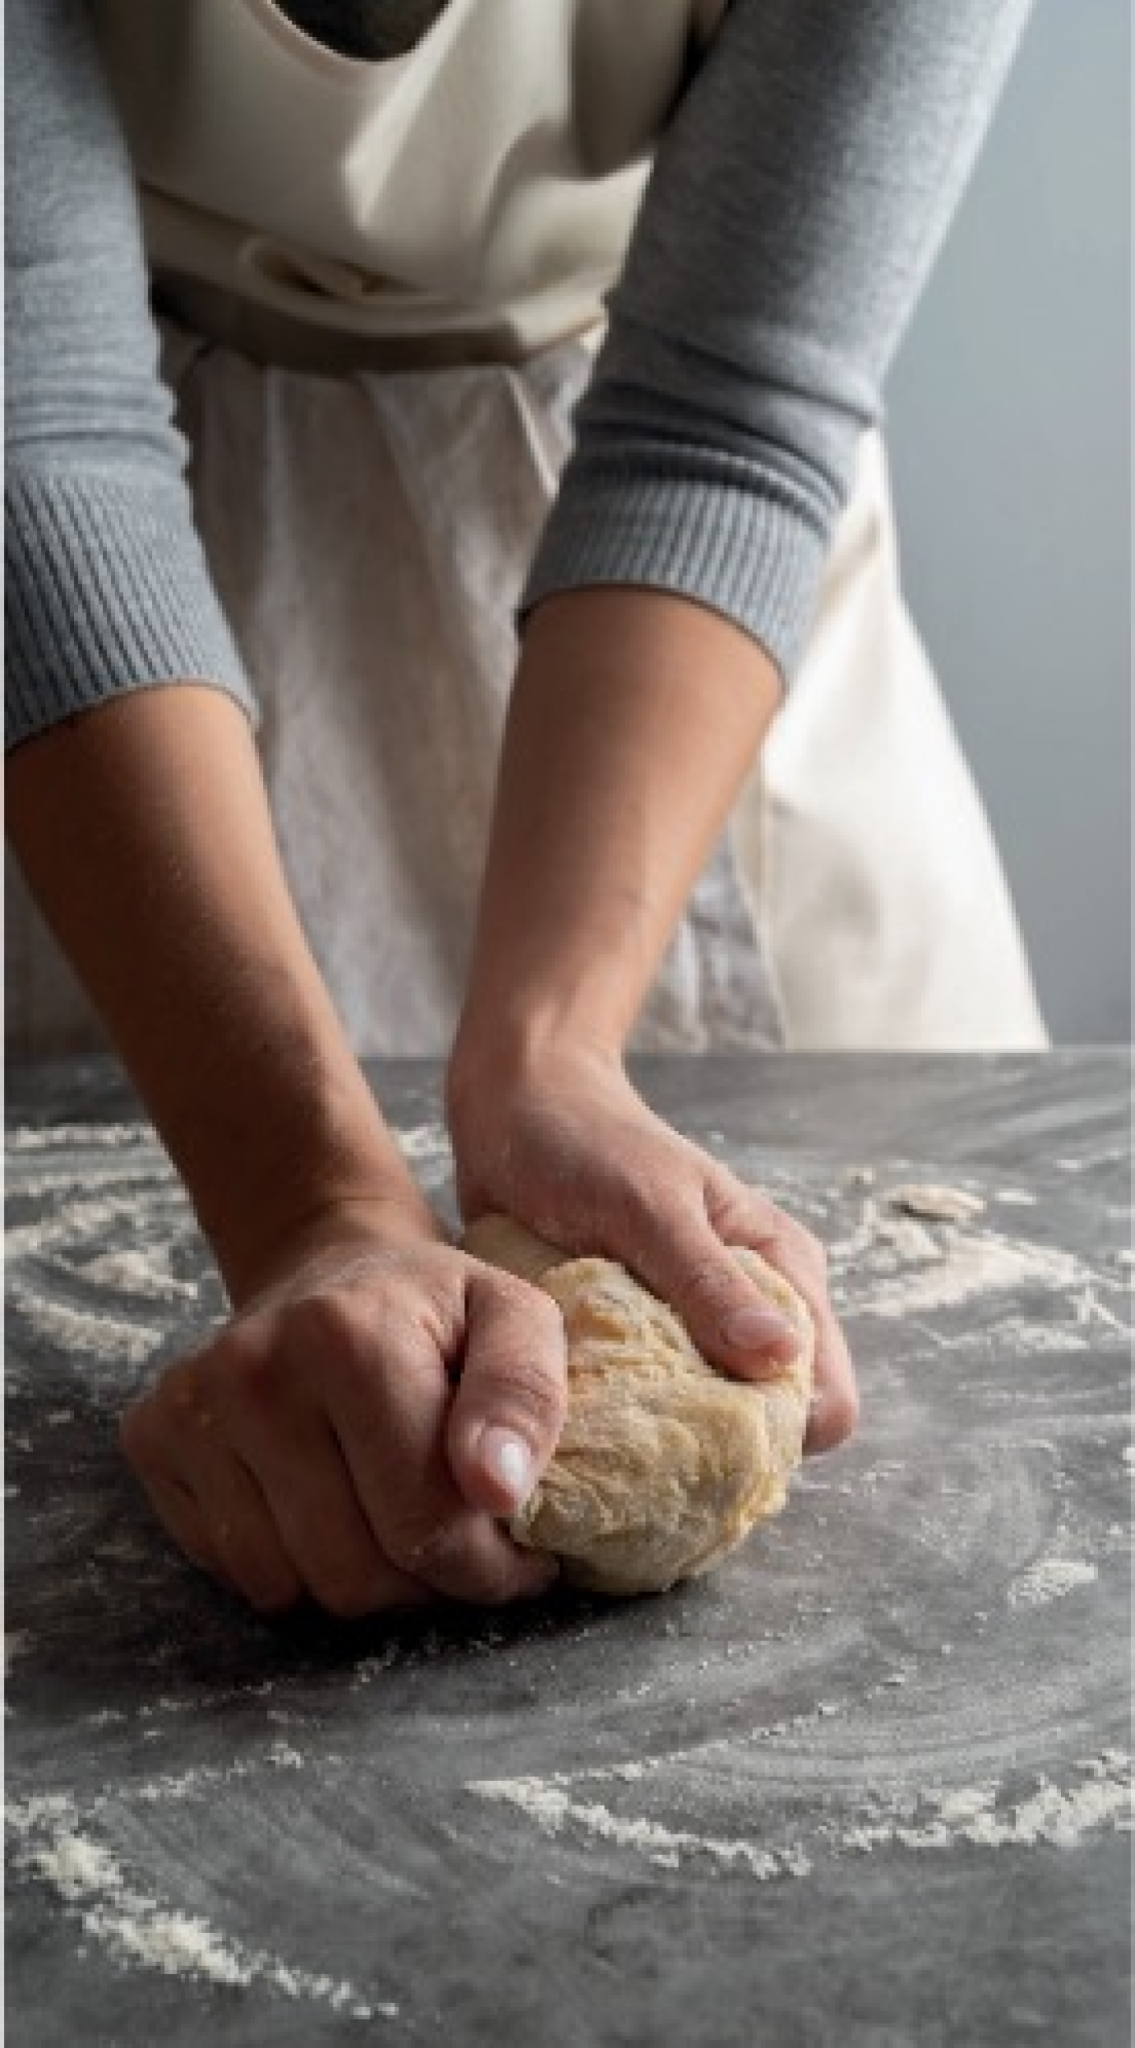
If you’re starting with a cream scone recipe and want to use butter and milk instead, start by mixing together the dry ingredients. Then cut cold butter into 1/2″ chunks and add it to the dry ingredients. Using your hands or a pastry blender, work the butter into the dry ingredients until the largest pieces of butter are slightly smaller than dime-sized. Add the milk to any of the other liquid ingredients called for in the recipe (like eggs or vanilla).

Finish the dough by gently folding the wet and dry ingredients together. (A dough scraper is a perfect tool for the job here.) If the dough looks powdery and dry, add additional milk by the tablespoon until it holds together. Working in the cold butter in this fashion will give you a layered, slightly flaky scone.
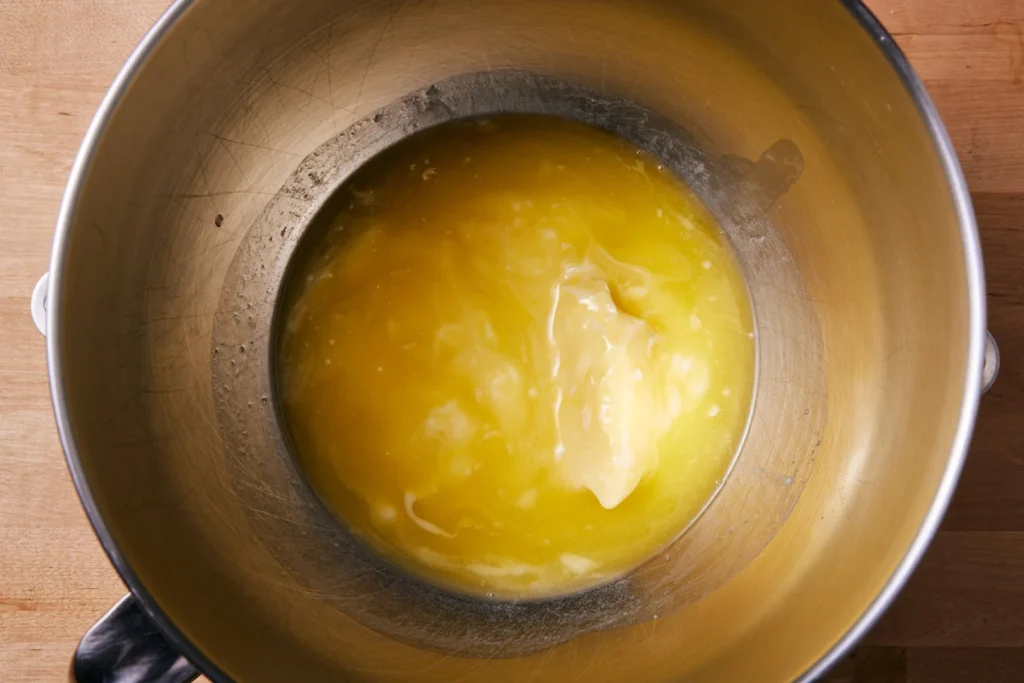
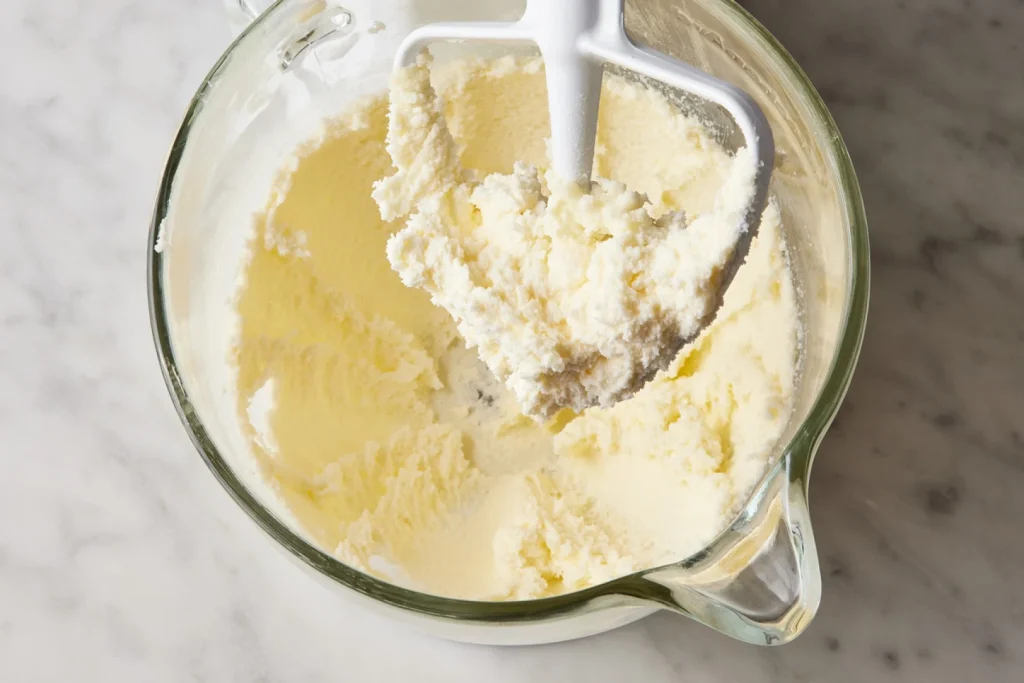
Or melt the butter

What if you want to recreate something close to those super-tender cream scones you had your heart set on? Simply heat the butter and the milk together until the butter melts, and add them both when your recipe calls for the cream.

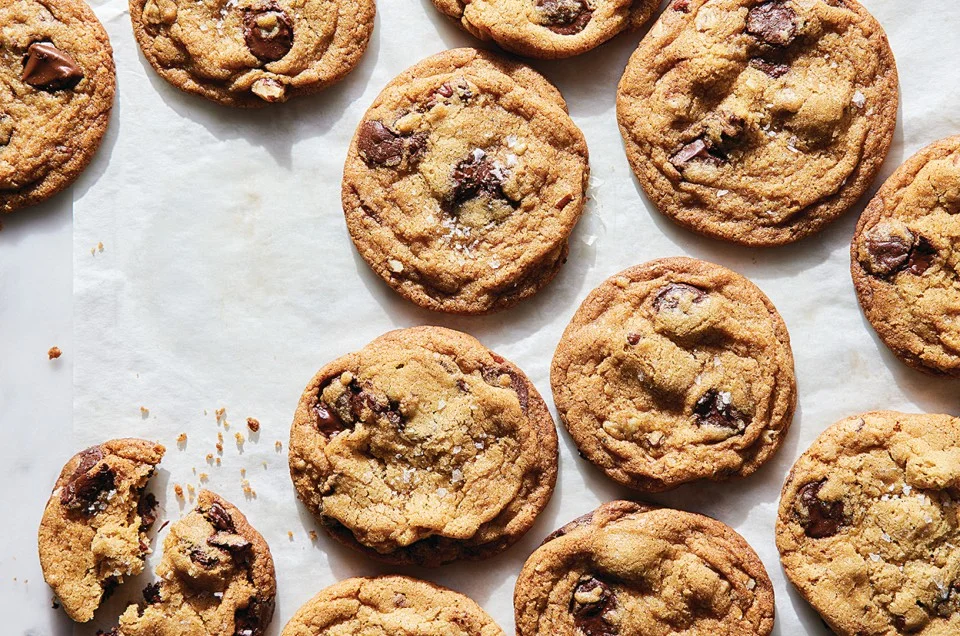
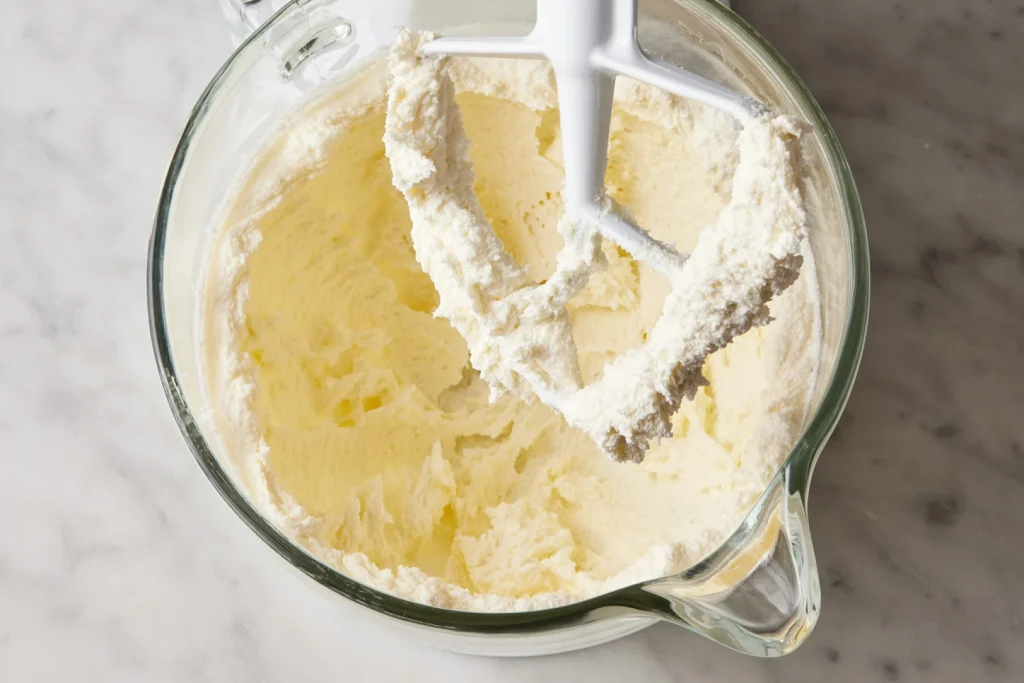
Testing our Cream Tea Scones

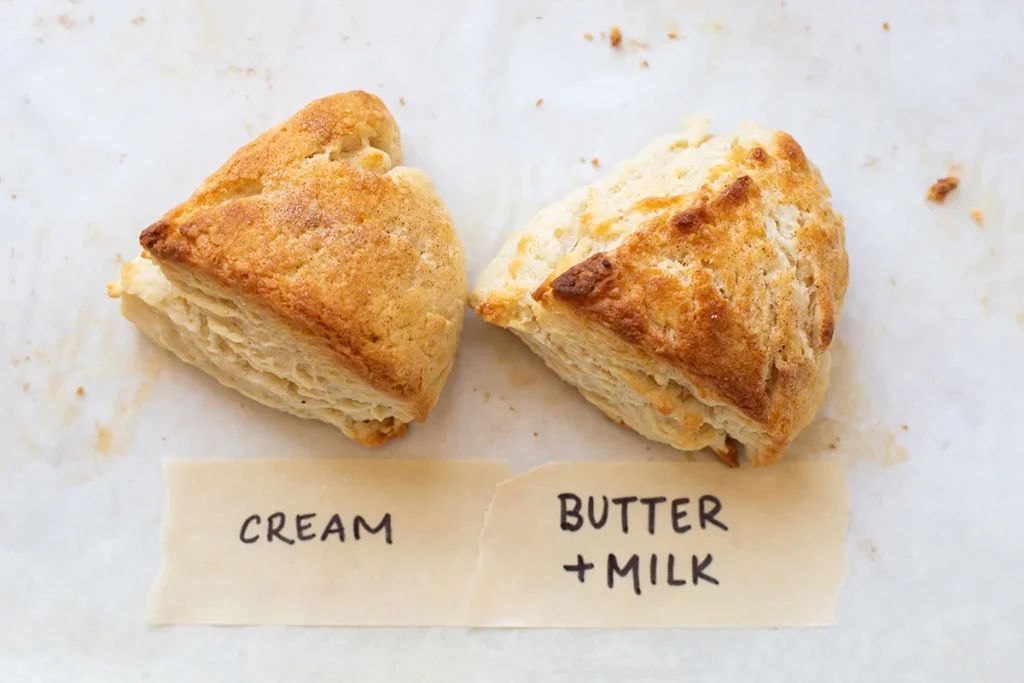
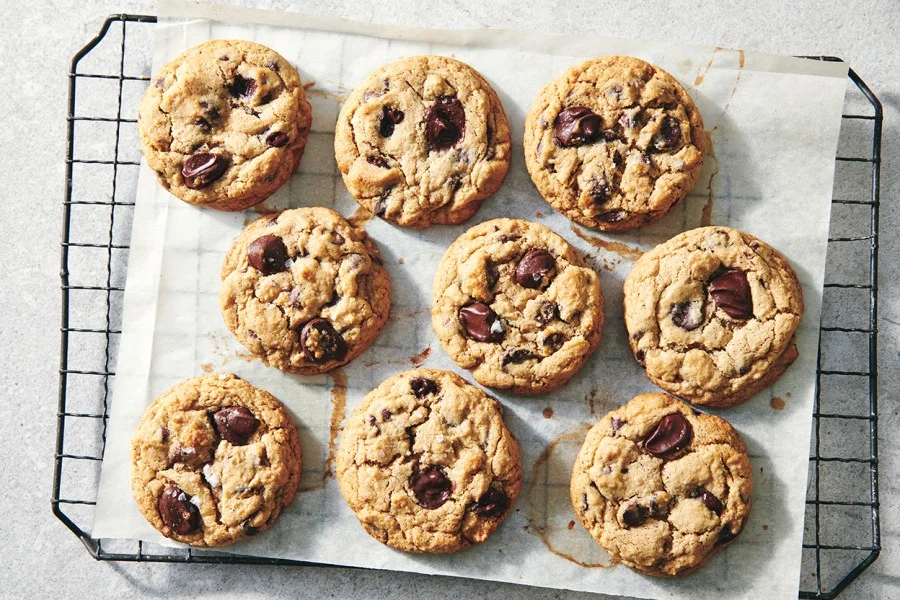
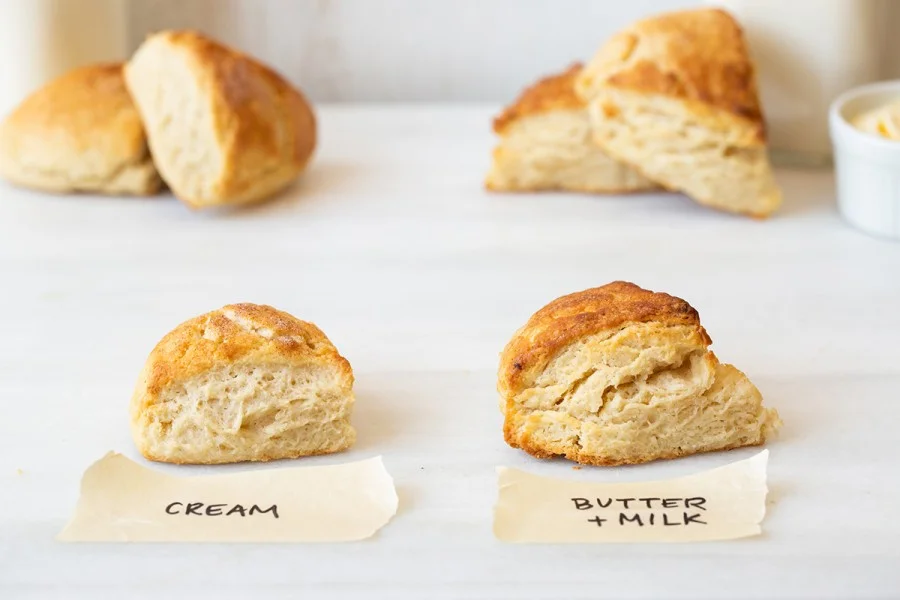
We put the substitution ratio to the test by comparing our classic Cream Tea Scones (left) with a batch converted to butter and milk (right).


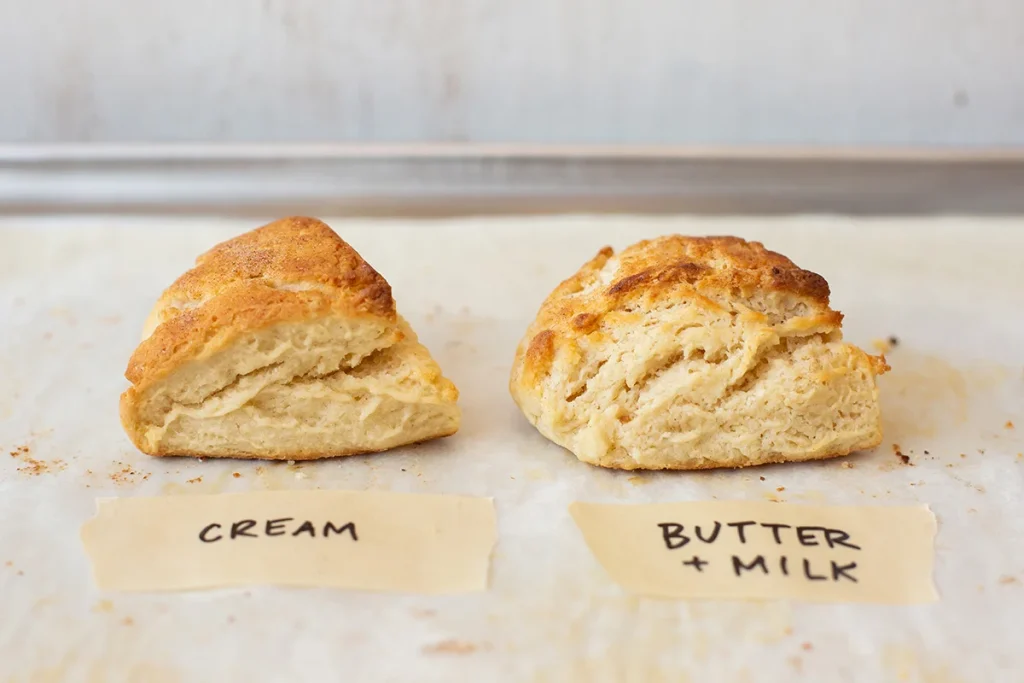
Side by side, you can see that the cream scones are more cakey and delicate. The butter scones look almost layered and rise just a bit higher, despite the unbaked scones being the same height when they went into the oven.

The flavor of the cream scones is just a bit richer than the butter scones. They don’t need any additional butter or garnishes before serving. The butter-based version, on the other hand, welcomes a pat of warm salted butter.

Posted on Leave a reply

Understanding the difference between baking soda and baking powder

Understanding the difference between baking soda and baking powder

By: izzah zainal | February 17, 2025

It’s hard to truly understand the importance of baking soda and baking powder — and the difference between the two — until the day you accidentally stumble and add one instead of the other, or forget to add one entirely. If you need visuals, just imagine sunken banana bread, squat scones, and deflated cupcakes. An eerie sight, am I right?

Sometimes it can be downright confusing how a mix-up in leavening agents makes or breaks a cake batter or cookie dough. And such ignorance is never bliss, especially when it results in frightening baked goods. So to avoid any baking mishaps, here’s a breakdown of the difference between baking soda and baking powder, what they contribute to baking, and suggestions for substitutions if you find yourself without one.

What is baking soda?

Let’s quickly return to high school chemistry class. Baking soda (or sodium bicarbonate) is a base compound with a pH level of 8. When it mixes with an acidic solution, it reacts to produce carbon dioxide — a.k.a. the gas required to get that desirable lift in baked treats.

As a result, baking soda needs an acidic partner to work its magic; this can be a wet ingredient like sour cream, buttermilk, yogurt, lemon juice, vinegar, maple syrup, or honey, but it could also be a dry ingredient like brown sugar or natural cocoa powder. (Dutch-process won’t contain enough acidity.) Once paired and mixed, baking soda instantly starts to react with that acid. Therefore, with recipes that lean on baking soda, it’s better to get batters and doughs in the oven straightaway so the reaction doesn’t die down before you even start baking.

Baking soda creates a less chewy and more tender, airy texture in baked goods. It’s no wonder it’s called for in quick bread recipes to provide shape and soft crumb without having to rise for a long time like traditional yeasted bread. As a leavener, baking soda is more responsible for the outward spread of baked goods. (Remember: soda = spread).

What is baking powder?

While baking soda needs a co-conspirator, baking powder is a complete mixture of baking soda and cream of tartar, a powdered form of tartaric acid, so it has both the basic and acidic components necessary to produce carbon dioxide. In grocery stores, you’ll often come across “double-acting” baking powder, meaning it reacts twice. The first reaction occurs when you’re mixing batter and the powder dissolves. (Think about how when you let pancake batter rest for around 15 minutes, it thickens and bubbles slightly — this works on the same principle.) The second reaction takes place when the batter hits the heat and begins to bake.

Inside any high-rise scone or jumbo muffin is typically a good amount of baking powder. That’s because baking powder adds height, fluff, and lightness. (Remember: powder = puff). Just feast your eyes on the glow-up that 1 tablespoon gives Baking Powder Biscuits. I’m not saying if you skimp on the baking powder, you’ll be left with dense, inedible doorstops, but I’m not not saying that either — there’s a reason the ingredient is in the recipe name.

Why do some recipes call for both baking soda and baking powder?

If a recipe requires both leavening agents, there’s a good chance there’s acid included in the recipe, yet not enough to trigger a full reaction when combined with just baking soda on its own. In such cases, baking powder comes in as reinforcement to do most of the leavening, while baking soda is there to neutralize the acid (lessening the astringent taste) and contribute some lifting power. Now that’s teamwork!

Can you use baking soda instead of baking powder? Or vice versa?

You can’t substitute equal amounts of baking soda for baking powder in a recipe, or vice versa. But! There is some wiggle room for substituting.

To put it briefly: Don’t substitute these ingredients for each other (or other swaps) if you can help it, but should you be in a pinch (maybe in the middle of mixing your brownie batter when you realize you’re missing baking powder) there are a few options to swap in. Some may be sitting in your kitchen as we speak! It’s important to keep in mind that these ingredients are happy to step in and do a good job, but they won’t perform absolutely the same as the original leavener called for in the recipe.

Learn how to create deliciously roasted sesame seeds for your meals by following the step-by-step instructions below.

Substitutions for baking soda

Baking powder: Baking powder can be used to replace baking soda, though not at a 1-to-1 ratio. Because the former is not as strong as the latter, it’s important to use three times the amount of baking powder as baking soda. Be aware, a slightly bitter, off-putting taste might result from using that much baking powder.

Sub for 1 teaspoon baking soda: 3 teaspoons baking powder

Substitutions for baking powder

Baking soda + cream of tartar + cornstarch: You can’t just sub baking soda directly for baking powder, but you can use it alongside other ingredients as a swap. Remember, baking powder is a mixture of baking soda and cream of tartar — which means you can easily make it yourself.

Sub for 1 teaspoon baking powder: Combine 1/4 teaspoon baking soda + 1/2 teaspoon cream of tartar + 1/4 teaspoon cornstarch or tapioca starch.

Baker’s ammonia: Baker’s ammonia is a trusty leavener from the 19th century that produces a light, tender crumb similar to what you’d get from baking powder. You can use it 1:1 in place of baking powder. Be aware: It doesn’t smell great, but no need to worry, as the smell totally dissipates by the time baked goods are done.

Sub for 1 teaspoon baking powder: 1 teaspoon baker’s ammonia

Lemon juice or vinegar: These acids react with baking soda to mimic the power of baking powder.

Sub for 1 teaspoon baking powder: 1/4 teaspoon baking soda + 1/2 teaspoon lemon juice or white vinegar

Posted on Leave a reply

How to achieve your perfect chocolate chip cookie

How to achieve your perfect chocolate chip cookie

By: izzah zainal | February 16, 2025

A few tweaks — more sugar, a dash of milk — can make cookies crispy, chewy, or cakey.

Good bakers know how to follow recipes. Great bakers know how to tweak them — how to deviate subtly from the printed word and create something that’s not just tasty but tailor-made to your palate. The line between good and great is surprisingly easy to navigate when it comes to chocolate chip cookies. All you need is a little cookie science and a friendly guide to show you the way.

Just a few simple changes can turn a regular chocolate chip cookie into one that’s extra-crunchy, extra-chewy, or extra-cakey. We recommend using our Easy Chocolate Chip Cookies recipe, but these tips are broadly applicable to chocolate chip cookie recipe that makes a similar quantity of finished cookies.

How to make crunchy chocolate chip cookies

Add 2 tablespoons granulated sugar and bake for 2 to 4 extra minutes.

What does the extra sugar do to the cookie dough?

Although sugar may seem like a simple ingredient, it plays a very important and complex role in cookie dough. It contributes to both texture and flavor in many ways: It melts in the heat of the oven to increase spread, and it creates little air pockets in the dough to expand and make cookies rise. Sugar also caramelizes and participates in Maillard reactions to add both color and additional flavor notes, and it recrystallizes upon cooling to give the cookies crispy texture. (Maillard reactions are when amino acids react with sugars to give you the brown color and caramelized flavor in baked goods.)

When adding an extra few tablespoons of granulated sugar, you increase the ratio of sugar to fat and flour in the cookie. This will result in a bit more spread, a larger surface area and more material to caramelize and react and, of course, a little bit of extra sweetness as well, which never hurts.

You may notice that the cookies won’t be crispy immediately out of the oven; that happens later. While the exact science of cookie cooling is still somewhat of a mystery, one theory is that as the molten sugar retreats to its crystalline structure and solidifies, the cookie becomes crispy as opposed to bendy. Working with that theory, we can then understand why the more sugar present to recrystallize, the more snap your cookie will have.

How does granulated sugar act differently than brown sugar?

Granulated sugar contains little to no “invert sugar,” which is what you find in the molasses or refiners syrup added to brown sugar. This invert sugar is actually single monosaccharide molecules that were created by breaking down the double disaccharide molecules that make up granulated or table sugar (sucrose). These monosaccharides possess different chemical properties that make cookies chewier, as we’ll see in the tip below.

Why the different bake time?

By adding extra sugar, you can bake the cookies to a slightly higher temperature without over-baking, which will allow for a crispier final cookie as well as deeper flavor development.

Why not just bake any version longer to get a crunchy cookie without added sugar?

While it’s certainly true that baking any cookie longer will cause it to have a firmer final texture, having the extra granulated sugar allows the cookie to maintain a tender, “snappy,” crisp texture (due to the properties discussed above), as opposed to a less enjoyable hard/crunchy texture.

How to make chewy chocolate chip cookies

Add 2 tablespoons brown sugar.

What does extra brown sugar do to the cookie dough?

While brown sugar is similar to granulated sugar in many ways, it has one major functional component that granulated sugar does not: invert sugar!

The two primary invert sugar monosaccharides found in brown sugar are glucose and fructose, which are actually bound together to make the disaccharide sucrose — what Americans know as our standard white table sugar.

Compared to sucrose, invert sugars caramelize at a lower temperature, and absorb and retain more moisture; fructose is particularly hygroscopic, meaning it really loves to suck up and hold onto water.

Invert sugars also interfere with recrystallization upon cooling, which helps make cookies crisp. By holding that extra moisture and delaying the sugar’s recrystallization, brown sugar has the wonderful ability to give you a moist, bendy, chewy cookie.

Does it make the chocolate chip cookie extra sweet?

While a particularly perceptive taster might be able to tell the difference in sweetness with the additional two tablespoons brown sugar, the overall sweetness level only increased slightly. It’s really just a delightfully sweet cookie at either level.

Do light and dark brown sugar work the same?

In fact, they do. The differences between light and dark brown sugar in terms of the amount or types of syrup used are usually minimal, even though you might expect otherwise given the significant difference in coloration.

How to make cakey chocolate chip cookies

Add 2 tablespoons milk.

What does extra brown sugar do to the cookie dough?

Although it may seem obvious, the most important role extra milk plays is adding a little more liquid. As cookie dough is very low in hydration, that two tablespoons of milk have more of an impact here than in something with higher hydration, such as cake batter.

Milk is around 85% water — and that water will evaporate in the heat of the oven to form steam. This steam will migrate to air pockets created by the melting sugar grains.

As the steam gets hotter, it teams up with gases produced by the leaveners, expanding those air pockets. That expansion causes the cookies to puff and rise in the oven, creating an airy, cakey texture.

The moisture contributed by the milk will also increase spread and hydrate more of the starches in the flour. These hydrated (gelatinized) starches support the structure of the air pocket wall, keeping the cookies from collapsing once cooled. By holding more water, they also help keep the cookies softer over time.

Why milk and not water?

While milk is mostly water, those other little molecules in milk do serve a purpose. First, their presence means that there’s 15% less liquid being added to the dough, and this helps prevent the dough from spreading too far and turning into some less-than-ideal chocolate chip pancakes in the oven.

The proteins in milk — about 3% to 4% — will enhance Maillard reactions (as discussed above) and contribute many of the flavor notes that we recognize as “baked,” giving the cookies their roasted, toasted, and even sometimes nutty notes. Finally, the fat and sugar from the milk also add extra tenderness and richer flavor.

Sugar creamed with warm or melted butter is grainy and greasy.

If your butter is just right

Now that we’ve seen both extremes, let’s check out the results when the butter is at the right temperature. The mixture is lightened in color, it’s visibly fluffy, and it’s not clinging to the sides of the bowl.

Sugar creamed with room temperature butter is pale and fluffy.

Let’s look at the three results side by side. Starting on the left: too cold and the mixture sits in a lump. Too warm, and the mixture spreads out and has an oily layer. Finally, properly creamed, the mixture sits up tall and has visible fluffy peaks.

From left to right: sugar creamed with cold butter, warm butter, and room temperature butter.

Besides looks, the feel of each mixture will be different as well. Under-creamed and your mix will feel like wet sand or damp cornmeal. Over-creamed, and your mix will have the feel of oil and sugar on your fingers, rather like a facial scrub. Your well-creamed mix will be moist and light and the sugar will be nearly dissolved. You’ll barely feel any grit when you rub it between your fingers.

The right mixing speed and duration for creaming

Of course, having correctly softened butter is just one part of the equation, albeit a big one. Mixing at too high or too low a speed and for too short or long a time will also wreak havoc with your creaming. With the advent of the more powerful stand mixers that we use today, gone are the days of having to whip the butter and sugar mixture on high speed for several minutes to achieve good results. Instead, a moderate speed (typically speed 3 to 4 on a stand mixer) for 2 to 3 minutes is sufficient to get the aeration you’re looking for, being sure to scrape the bowl halfway through.

Under-creamed butter and sugar

If you under-cream your butter and sugar mixture, it will remain dense, grainy, and dark in color:

Under-creamed butter and sugar

If you under-cream your butter and sugar mixture, it will remain dense, grainy, and dark in color.

Correctly creamed butter and sugar

Perfectly creamed butter and sugar should be light, fluffy, and pale in color (but not white).

Perfectly creamed butter and sugar

Perfectly creamed butter and sugar should be light, fluffy, and pale in color (but not white).

Over-creamed butter and sugar

If you beat too long and hard, the mixture will be over-creamed, becoming nearly white in color. Because it’s too aerated, it can result in dense, gummy streaks in your cake when baking.

Over-creamed butter and sugar.

Unfortunately, if the butter and sugar has gone this far there’s no going back. We hope you’ve found this information helpful. A picture is worth a thousand words, they say, and we hope these photos and our video will help you achieve the cakes and bakes of your dreams.

Posted on Leave a reply

Using the chocolate tempering machine

Using the chocolate tempering machine

By: izzah zainal | February 15, 2025

Need a large quantity of workable chocolate? Then it’s best to use the chocolate tempering machine.

Good To Know:

Why is fluidity so important?

The fluidity of your chocolate determines the thickness of the shell and the snap of your chocolate products: the more fluid your chocolate, the thinner and crunchier your shell will be.

Using chocolate with the right fluidity also saves time: you can cast large moulds in one go with less fluid chocolate. Chocolate with a higher fluidity is better for moulds with a lot of detail, but you’ll need to fill your mould with chocolate 2 to 3 times.

Why is it so important to pre-crystallise chocolate properly?

It helps chocolate harden, and gives it a beautiful satin gloss and a delicious snap. It makes chocolate contract during cooling, which makes it easier to unmould. Badly crystallised or uncrystallised chocolate will turn grey and won’t have an appetising gloss.

What is tempering or pre-crystallising?

The purpose of tempering chocolate is to pre-crystallise the cocoa butter in it, which is important to make your chocolate ready for processing. During tempering, the cocoa butter in the chocolate takes on a stable crystalline form. This guarantees a perfect finished product with a satin gloss and a hard snap. It also makes the chocolate contract during cooling, which makes it easier to unmould. If chocolate is simply melted (between 40 and 45 °C) and then left to cool down to a suitable working temperature, the finished product will not be glossy. If you make the small effort of bringing your chocolate to the right working temperature properly, you are guaranteed to get the desired end result. And that’s what we mean by tempering: bringing chocolate up to the right working temperature while making sure that the crystalline structure of the cocoa butter in it is stable. As you’ll discover below, the three key principles for proper tempering are time, temperature and movement.

Step 1

Pour a small amout of chocolate into a plastic or glass bowl.

Step 2

Place the bowl in a microwave and melt the chocolate at 800-1,000 W.

Step 3

Take the chocolate out of the microwave every 15 to 20 seconds and stir well to make sure that the heat is distributed evenly throughout and to keep the chocolate from burning.

Step 4

Repeat this procedure until the chocolate has almost entirely melted. Some small pieces of chocolate should still be visible in the bowl.

Step 5

Take the bowl out of the microwave and stir the chocolate well until all the pieces of chocolate have disappeared. You’ll notice that your chocolate is now smooth and slightly thicker. That means it is properly tempered and ready for use.

Which chocolate needs to be tempered?

Each variety or type of chocolate should be tempered before you use it to mould chocolates and hollow figures, or to enrobe cakes and chocolates. In short, whenever chocolate needs to have a beautiful satin gloss and a hard snap, tempering is absolutely crucial.

When you add chocolate to dishes as a flavour component (e.g. chocolate mousses or bavarian creams), it suffices to simply melt it without tempering. All our recipes clearly indicate if your chocolate should be tempered or not.

A general overview of baking pan materials

The biggest distinction between pans is heat transfer. Metal conducts heat the most efficiently — in other words, it gets hot the quickest and transfers heat evenly across the pan’s surface — which is why many professionals choose aluminum pans. (Another benefit: Metal pans withstand rapid temperature changes, meaning you can take your pie plate from the fridge to the oven without worrying about shattering.)

Glass, on the other hand, is an insulator. Because glass slows the flow of heat between the oven’s air and your dough, it takes more time to heat up than metal — meaning your dough takes longer to heat too. But once it’s hot, it retains that heat well, and it stays hot for longer than metal. For pie, there’s one more bonus: The clear material means you can visibly check how brown your crust is getting.

Ceramic pie pans are usually either stoneware or porcelain, and they can vary based on the material and how it’s made. They can also vary in thickness and thus heat transfer, so ultimate performance depends on which brand or maker you’re baking with. Overall, though, they tend to be slower to transfer heat than more efficient metal pans, though they retain heat well.

Posted on Leave a reply

How to store chocolate products

How to store chocolate products

By: izzah zainal | February 7, 2025

Bad storage will have a negative impact on the quality of your finished product. To prevent this from happening, we show you the ins and outs of the proper storing procedure.

Good To Know:

Why is it so important to store your chocolate creations in the right conditions?

Constant storage temperatures are essential to slow down the white-greyish discoloration (i.e. fat bloom) that naturally appears on the chocolate’s surface.

Avoid temperature shocks since they may cause sugar bloom.

Storing chocolate in a space that is too humid or too cold may expose it to condensation, often causes sugar bloom.

Never store chocolate near strong-smelling products as chocolate has the tendency to absorb odours.

How can you slow down the appearance of fat bloom?

Store your finished chocolate products at a constant temperature between 18°C and 20°C. Fat-based fillings (e.g. pralines or nut-based fillings) will make fat bloom appear faster. You can prevent this by adding 5% to 6% cocoa butter to your filling and then pre-crystallising (or tempering) it.

What causes sugar bloom?

Temperature shocks, or storing chocolate in a space that is too humid or too cold (thus exposing it to condensation) in many cases gives rise to sugar bloom.

Posted on Leave a reply

How to make chocolates in a mould

How to make chocolates in a mould

By: izzah zainal | February 7, 2025

Eager to get started on those beautiful moulded chocolates? This step-by-step breakdown will help you achieve the perfect end result.

Good To Know:

What should you take to heart when making moulded chocolates?

Use polycarbonate moulds. These yield the best gloss and contract slower than chocolate, making unmoulding far easier. Choose a fluid chocolate: a three-drop or four-drop fluidity is ideal. Heat the moulds briefly before pouring in your chocolate. This way, you’ll avoid temperature shocks that could make your chocolate turn grey afterwards.

Make sure that your filling is smooth and fluid enough to pipe easily. Also check that it isn’t warmer than 28°C, otherwise the filling will make your chocolate shells melt. Try to avoid making smudges on the rims of your chocolate moulds with the filling as they may cause leaks in your chocolate shells. Always fill each chocolate shell individually. Never fill the chocolate shells to the brim. Leave a 1.5-mm opening from the top, otherwise it would be impossible to seal your chocolates properly.

Needed:

  1. Moulds for chocolates (pralines), preferably in polycarbonate
  2. A ladle
  3. Chocolate melter or tempering machine
  4. A small palette knife
  5. A chocolate scraper
  6. Sheet of paper

Step 1

Temper the melted chocolate.

Step 2

Warm your chocolate mould with a heat gun to a temperature of 26 to 27°C, but make sure it doesn’t become warmer than your tempered chocolate.

Step 3

Fill the mould with tempered chocolate. Hold the mould at an angle and scrape off the excess chocolate from the top and sides of the mould.

Step 4

Tap the mould firmly against your worktop to remove any air bubbles from the chocolate.

Step 5

Pour the chocolate back into the melter, but make sure that all sides and corners of the mould cavities are evenly covered with chocolate.

Step 6

Scrape off the excess chocolate from the top and sides of the mould again.

Step 7

Let the chocolate set for about 5 minutes: put the mould on a sheet of paper with is open side facing down and allow the excess chocolate to drip onto it (until the dripped out chocolate begins to set).

Step 8

Scrape off the excess chocolate one last time and leave the chocolate to harden in a refrigerator at 14 to 16°C for a few minutes. The chocolate shells are then ready to be filled with a ganache, praline or other filling.Which type of chocolate is best suited to create moulded chocolates?

For a medium thick chocolate shell:

All chocolate types with a basic three-drop fluidity are right about perfect. They make it easy to create a chocolate layer with the perfect thickness and minimise the chance of having unwanted air bubbles, especially in comparison with more fluid chocolates.

For a fine chocolate shell:

Some chocolate lovers and craftsmen want the chocolate shell of their moulded chocolates to be as fine and crunchy as possible. A more fluid chocolate with a 2% to 4% higher cocoa butter content is absolutely perfect for this. You can easily recognise these types of chocolate by the four-drop symbol indicated on their packaging.

Posted on Leave a reply

Critical Elements of Bread Making

Critical Elements of Bread Making

Introduction

Understanding the role of Flour, Water, Dough Development and Temperature control are the keys to successful bread making. Understanding the relationship between the four elements and their interdependence enables you to practice mastering the initial art of baking bread.

Floor Quality

Part One of this handbook listed the flour  types, their protein content and their uses. On average, flour with 12 – 14% protein content will give the best result for bread making. The flour requires its ability to form a strong gluten matrix, whether mixed by hand or machine.

The retail supermarket’s flours will produce a satisfactory result, provided you follow the correct processes.

My advice for a beginner is to start with the flour available in the local supermarket and observe the results you achieve with the dough you make from it. Remember, it will require you to prepare many doughs to acquire proficiency with any flour. Resist the  temptation to try different brands until you are  happy with the process and the supermarket  flour results. Once you are satisfied with the handling, processing, baking, etc., look for other flours that may provide different volumes, aromas, etc.

Quote: “Good flour is not cheap and cheap flour is not good “. The secrets are in the process, not the flour! The protein content will guide the amount of water the flour will hold.

Water Absorption

The water content can vary from 58% to 100%, depending on your product and process.

Starting with water at 60% to 75% based on the flour weight of the recipe is an excellent range. I advise having a tight dough (62% – 65%) as you will be more able to handle this. Once you have mastered the process, increase the water gradually and determine what amount suits you best. Water used in the dough also controls the dough temperature and the fermentation rate.

Dough Development

When mixed, the ingredients for the dough of flour, salt, yeast, and water will develop the gluten matrix, which becomes the structure for the bread.The gluten matrix holds the Carbon Dioxide CO2 produced through fermentation, causing the dough to rise. Hand development is satisfactory but a tedious process that requires  time and technique to master.

Using a mixing machine will save time and generally develop better doughs. Some home bakers use their bread machine to mix the dough, remove it once mixed, and continue the bread making process. Reaching the optimum requires understanding  the importance of developing the flour protein.

Gluten Matrix is the optimum development of the gluten proteins: Glutenin (elasticity – ability to resume shape after being stretched) and Gliadin (extensibility – the capacity to stretch). To test the dough development, you do the gluten stretch test. Take a dough ball and stretch it out by pulling it from the sides. A well-developed  dough will be extensible, stretching and not breaking.

MUST KNOW

Dough development through building a solid gluten matrix that will hold in the gas CO2 the yeast produces during fermentation is crucial and will require lots of practice to achieve consistency.

Temperature Control 

The dough’s water temperature depends on the environment, machinery, time taken for fermentation, and the style of dough you are making. Home bakers prefer chilled water in  Singapore or warmer climates.Place the dough water in a chiller (4°C) overnight, ready for use the next day. The chilled water will assist with the  finished dough temperature (after mixing) and  the amount added will help control the yeast’s  growth.

The water temperature where the climate is seasonable will require adjustments to maintain  yeast activity. Observing the performance of the dough at different times of the year will help you better understand how the yeast performs.

What is the optimum temperature for yeast activity? 

Yeast works best at temperatures of 36 to 40°C. The objective when making bread is to be able to control this activity until the dough is in the final proofing stage. In a warm climate keeping the dough cool is the objective.

In contrast, a warmer dough is necessary for consistent fermentation growth when it is frigid in winter in a temperate environment. Hence the use of chilled or tempered water depends on the climate and dough-making style used.

Room temperature refers to the ambient temperature of the room where the doughs are mixed, which will vary due to climatic conditions. An ideal room temperature will be between 22°C to24°C.

The pH of Yeast Dough

The acidity level of the bread is the result of the fermentation process. During the dough fermentation stage, alcohol and carbon dioxide (CO2) react with the organic acids that produce flavour. The yeast growth activity is related to the ambient temperature, water and fermentation time. In typical bread, the pH ranges between
5.3– 5.8, depending on the processing style. In sourdough bread, the pH is lower and ranges from3.8 – 4.6, giving the bread its characteristic flavour.

Posted on Leave a reply

Your Personal Guideline

Your Personal Guideline

BEST BAKES

B

Buy a set of digital scales that measure in 1g units. Start your baking journey methodically!

E

Examine and understand the nature of each stage of the process before undertaking it. Check critical details.

S

Specifically weigh all the liquids in the recipe.

T

Temperature management of ingredients and maintaining process control temperatures are vital elements in your success.

B

Baking times and baking temperatures will vary from oven range to oven range. Develop suitable oven settings from your actual experience with that oven.

A

Aeration in its many forms, is the key to all baking. Achieving optimum aeration requires adherence to critical stages of the process and a proper understanding of mixing speeds and times.

K

Keep records of what you have done to identify success when the product is out of the oven. Photos are a good idea.

E

Enjoy each baking experience and be patient with yourself. You might have many failures as you travel along the baking journey. However, family and friends will have the opportunity to enjoy your attempts with gusto.

S

Study the recipe and ingredients thoroughly before attempting to make it!

Subscribe to our Newsletter Now

Get the latest recipes, products and classes available on RedManShop.