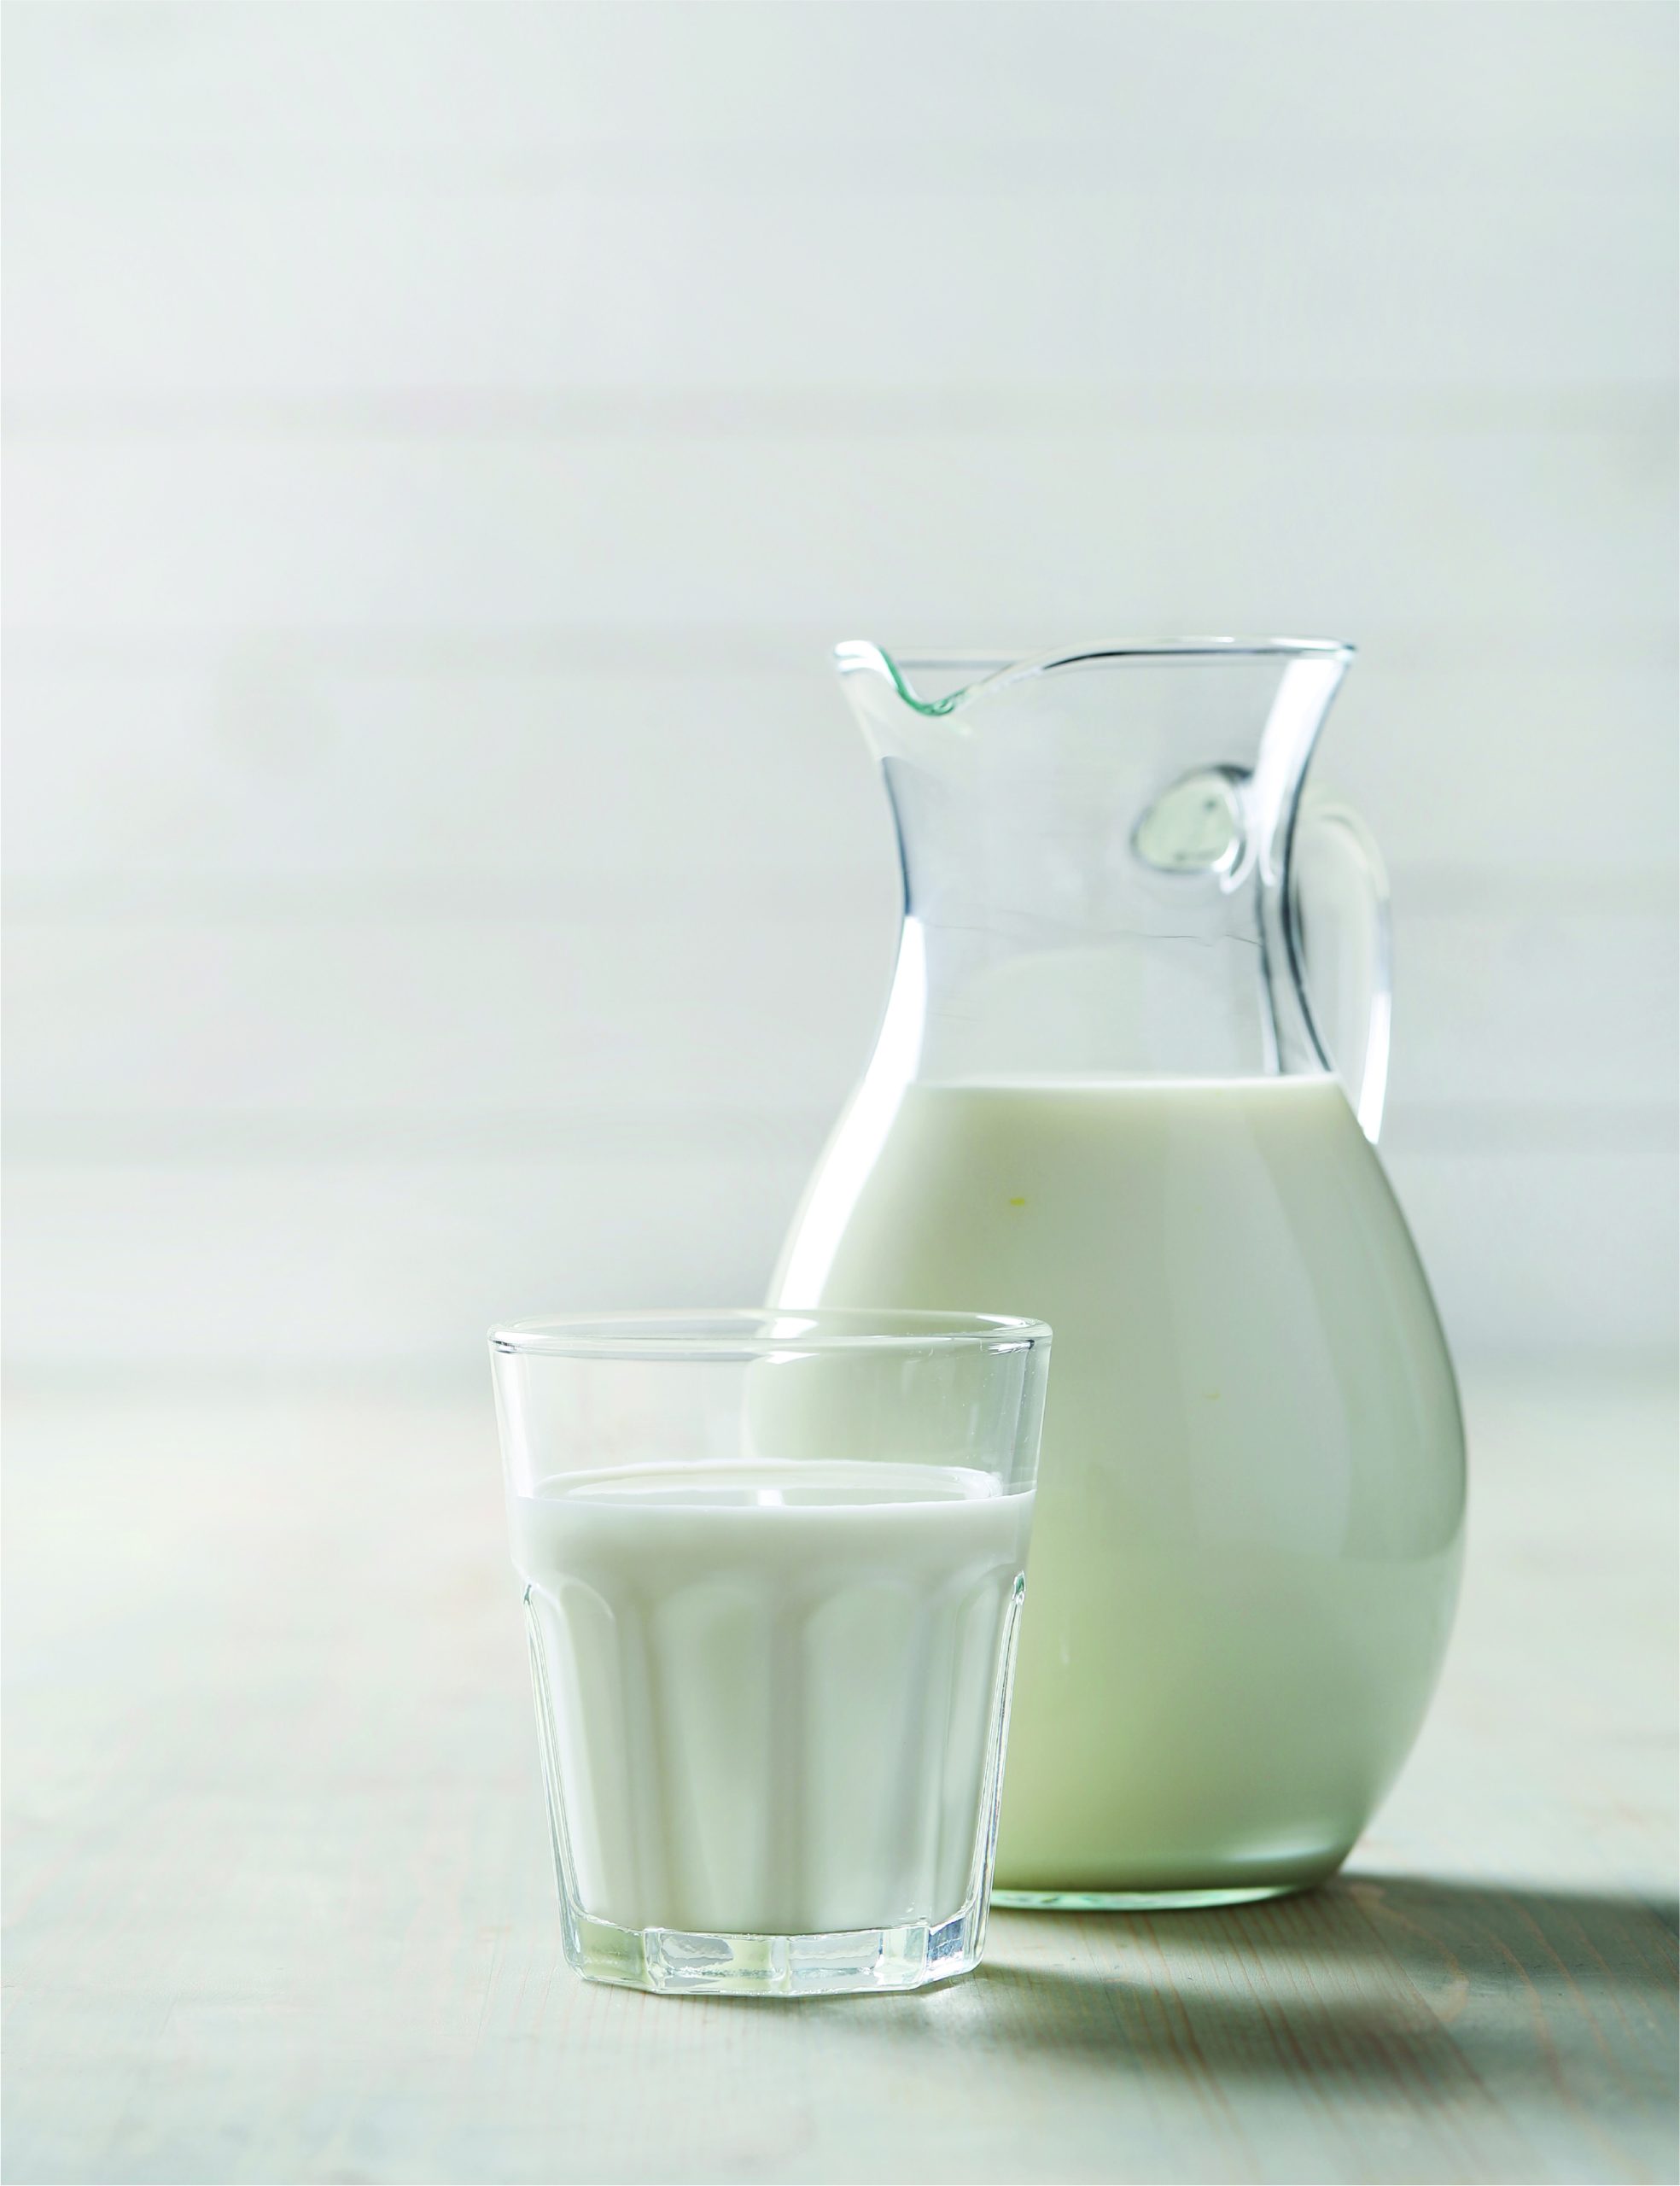
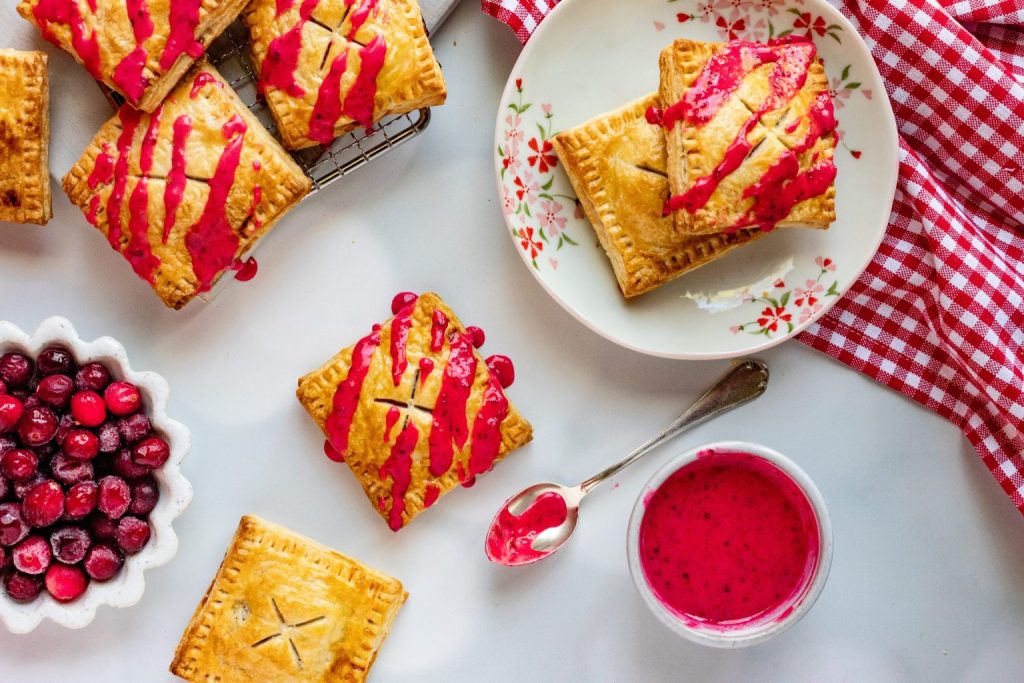
FREE DELIVERY ABOVE $30

Posted on Leave a reply

Egg

Egg

By: RedmanShop | February 17, 2025

Eggs

Eggs are a staple ingredient in baked items and bring a list of incredible attributes: Egg provides aeration, is a natural emulsifier, adds softness and tenderness to cake batters, brings nutritional value and assists in the shelf-life of products.

Fresh and liquid eggs are used to make fresh bakery products. The hen shell egg comes in various sizes/weights and should be cracked and weighed. Relying on the size gradings of eggs, e.g. 50g, 65g, instead of the liquid weight, can result in unbalanced recipes.

As a convenience, powdered eggs are a component in bakery pre-mix, with the application formula appropriating the liquid amount required for the egg powder. Eggs contain a natural emulsifying agent called Lecithin that stabilises cake batters.

Chicken Egg

Types of Eggs

 
Fresh

Shell Eggs / Egg Yolks / Egg White : The shell can be white or brown, with the colour related to the chicken’s genes. They come in varying sizes and should be weighed for accuracy when using them in a baking formula.

Fresh and Frozen

Liquid Whole Eggs / Liquid Yolk / Liquid Egg Whites : Shell eggs can be processed by pulping the whole egg to a liquid or separating the yolk and white.

Powdered Egg

Whole Egg / Egg Yolk / Egg White (Albumin) : The liquid shell eggs undergo a drying process that removes the egg’s moisture.

Pasteurisation of Eggs

For Food Safety reasons, egg products are pasteurised to destroy harmful bacteria and prolong shelf life. It is common practice for many brands of fresh shell eggs sold in the supermarket to have undergone pasteurisation.

Storage

Fresh shell eggs and fresh liquid eggs require refrigeration for safety reasons. Frozen egg product storage is at -10°C. Powdered egg products have an extended shelf-life of up to 5 years if stored in an airtight container at a low ambient temperature.

Must Know

The firmness of the yolk and white upon opening indicates freshness. Both should be firm, with the yolk having a bold appearance. Stale eggs will show a thin yolk that breaks easily and a thinner white. To obtain the best results when whipping, the fresher, the better.

Posted on Leave a reply

Understanding Flour Quality and Its Role in Baking

Understanding Flour Quality and Its Role in Baking

By: RedmanShop | February 17, 2025

Flour Quality

Flour quality relates to where the wheat was grown, the climate and rainfall, all of which have a bearing on the milled flour quality. Different products will use flours of varying protein levels. In bread making, the critical element is the protein’s ability to develop into a solid network to support the gas produced by the yeast. In cake making, low protein cake flour and other ingredients such as butter, eggs, sugar, baking powder, and the mixing method provide the structure of cake making. In cookie products, a lower protein flour is combined with butter and sugar.

Water Absorption

Water absorption refers to the amount of water the flour will hold when making a dough or batter. The bread maker wants to get as much water into a dough as possible to increase the number of units obtained. The stronger the protein content, the more water absorption will result. On the other hand, because the protein levels in pastry doughs are lower, the water content will range from 53% to 55%.

Cake flour’s (soft wheat) absorption rates vary depending on whether the flour is chlorinated. Chlorinated cake flour will absorb more liquids and support the liquids over a more extensive surface area resulting in soft and moist cakes. Non-chlorinated flour will not be able to carry as much water and if used in some cake batters, you can see a wet core along the base and a slight collapse. The addition of extra baking powder can correct the problem.

Flour Protein

Wheat flour is the only grain with suitable gluten-forming protein that develops when flour and water are mixed. The proteins are called Glutenin (elasticity) and Gliadin (extensibility) and are very important in bread making for mixing, shaping, and structuring the final loaf. The development of the gluten during the mixing of the dough is crucial. The gluten development when making bread will form the loaf structure, whether by hand or machine.

The belief that the higher the protein, the better the flour is not necessarily correct when making bread dough. The ability of the flour to be developed during mixing is critical. Observing how the flour performs when mixing is a good educator on the quality of the flour. Refer to Part Three, Bread Making, for details on the bread-making process of mixing, kneading, and processing procedures.

Flour Treatments

Most flour is now available as unbleached (previously, flour was treated with Benzoyl Peroxide to improve the whiteness). Some bread flours may have Vitamin C and enzyme (amylase) added to standardise the performance. Some cake flours are treated with Chlorine gas to improve performance in specific cake formulas by providing more liquids to enhance the cake’s shelf-life. The consumer can find this information under the ingredients list on the package.

Storage

A cool, dry environment is suitable for holding most flours. Wholemeal, especially stone ground, is best kept under refrigeration. For safety, regular flour should have a shelf life of up to six months. It is best to use refrigeration in a warm, humid environment for prolonged storage.

Must Know

Flour is a component in almost all bakery items; selecting the specific type requires some understanding of flour. Part Three practical section will provide details on the correct flour selection.

Posted on Leave a reply

Yeast – Baker’s & Natural

Yeast – Baker’s & Natural

By: RedmanShop | February 17, 2025

Baker’s and Natural Yeast

Baker’s and Natural are two types of yeast more commonly used in baking, each providing the basis for dough fermentation. Yeast requires special conditions for it to perform consistently throughout the fermentation process. Yeast growth is shown by its increasing capacity to multiply and bud. The conditions necessary for its growth are water, food, oxygen, time, temperature, and appropriate acidity/alkalinity level (pH).

Baker’s Yeast

Baker’s Yeast is a commercial product available in several forms, such as low-sugar or high sugar-tolerant varieties. The choice of which yeast will depend on the dough’s sugar levels. Low sugar yeast works well up to 10% sugar content, whereas high sugar yeast works best in doughs with above 10% sugar content. To check the Percentage of sugar in the recipe, use the Bakers Percentage calculation method, as explained in Part Two.

Types of Yeast

Compressed : Block form is the most common. It is also available in flakes for larger plant bakeries.

Dried Yeasts: Instant Dried / Instant Active DriedStrains of yeast that have had the water removed. The yeast is re-activated by mixing with warm water. It is added directly into the dough when it is mixed.

Note: To convert fresh yeast usage to dried yeast, multiply the quantity by 0.4.

High and Low Sugar Yeasts

The type of yeast used in the dough relates to the amount of sugar in the formula. For lean dough formulas, sugar will range from 0% – 10% on the flour weight. In rich sweet dough formulas, sugar can be 12% to 20% of the flour weight. The high sugar yeast strain is required in these doughs as regular yeast will not be able to create enough fermentation activity. The dough would move slowly as low-sugar yeast cannot cope with high-sugar levels.

Storage

For dried yeasts, refrigeration in airtight containers is most suitable. Fresh compressed yeast also needs refrigeration and is wrapped in appropriate paper to prevent it from drying out. Buy small packs until confident so as not to waste ingredients. Do not purchase large pack sizes (500g) at first, as they deteriorate with age.

Must Know

Yeast is a living organism and requires attention to detail to obtain a consistent result. Buying yeast in individual small sachets is recommended rather than a large amount. Once opened, its gassing properties deteriorate.

Natural Yeast – Levain (Sourdough)

A mix of flour and water (equal parts) stands in a clean container to attract the wild yeast cells and organic bacteria in the air. Once evidence of activity (bubbles or air pockets visible), a regular feeding process using equal parts of flour and water begins. The action is repeated for the next seven days. The result is that Levain replaces baker’s yeast for dough fermentation. For further details refer to page 71, Part Three on practical baking.

Storage

It is best kept refrigerated during the building stage and upon completion of the starter. Any leftovers from daily production must be returned to the mother and kept under refrigeration.

Must Know

Building the Levain is a slow and steady process requiring care so that the foundation is solid and healthy. Once you have the Levain, you must feed it so it is ready for use before making the dough. The flour used in the starter and feeding must be unbleached, with the most suitable being a medium protein.

Fermentation

Yeasts are used as an aerator, affecting product structure, flavour, volume, and quality. The yeast’s performance depends on the amount of water, its temperature, and the finished mixing temperature. It will be challenging to control this process as it could move too quickly or slowly at times, so it is crucial to have a clear understanding for success to follow.

Posted on Leave a reply

Baking trials: From metal to glass to ceramic, how does your pie pan affect your crust?

Baking trials: From metal to glass to ceramic, how does your pie pan affect your crust?

By: RedmanShop | February 7, 2025

Choosing the best pan for the best pie.

Baking is often about choices, and sometimes those choices can help you dial in your ideal bake. From selecting a certain cocoa for your chocolate cake to finding the cupcake decoration that feels both beautiful and achievable, bakers have a lot of agency beyond the strict confines of a recipe.

Can baking in a specific type of pan help you achieve a perfectly browned bottom, crispy and golden and not the least bit soggy? Let’s find out.

A general overview of baking pan materials

The biggest distinction between pans is heat transfer. Metal conducts heat the most efficiently — in other words, it gets hot the quickest and transfers heat evenly across the pan’s surface — which is why many professionals choose aluminum pans. (Another benefit: Metal pans withstand rapid temperature changes, meaning you can take your pie plate from the fridge to the oven without worrying about shattering.)

Glass, on the other hand, is an insulator. Because glass slows the flow of heat between the oven’s air and your dough, it takes more time to heat up than metal — meaning your dough takes longer to heat too. But once it’s hot, it retains that heat well, and it stays hot for longer than metal. For pie, there’s one more bonus: The clear material means you can visibly check how brown your crust is getting.

Ceramic pie pans are usually either stoneware or porcelain, and they can vary based on the material and how it’s made. They can also vary in thickness and thus heat transfer, so ultimate performance depends on which brand or maker you’re baking with. Overall, though, they tend to be slower to transfer heat than more efficient metal pans, though they retain heat well.

Putting the pie pans to the test

How these properties affect your baking often depends on the recipe you’re making. In pie, this primarily applies to the bottom crust. The ideal is a crust that cooks quickly and completely, even in a pie with juicy or liquid fillings. Let’s see how Easy Fall Mini Pies made with All-Butter Pie Crust and baked in metal, glass, and ceramic pie plates compare.

Note: Some crusts — notably those with added sugar — will naturally brown better, regardless of pan type. Again, there are always many factors to balance when baking!

The biggest takeaway

Though there were some slight variations among the pans (more below!), all of these pies ultimately turned out well. Their crusts mostly browned, and none were distressingly underbaked. This means that, no matter what kind of pan you currently have in your cupboard, you can still make good pie worthy of serving to friends and family.

Pie made in a metal pan

Of the three pies, the metal pan had the most even browning across the entire bottom crust. From the outer edge to the very center, the crust was golden brown and thoroughly baked. If I had my choice of pans, I’d go with an aluminum one like this.

Pie made in a ceramic pan

While the ceramic-baked* crust was far from soggy, it had the least even browning of the three pies. The center of the pie was pale and slightly underbaked, which wasn’t ideal, while the outer edge had a nice deep brown color.

Pie made in a glass pan

The glass pan resulted in a bottom crust that was somewhat evenly browned, though there was more variance than the metal pan: The center was paler than the outer edge of the crust. That said, the glass-baked crust was darker than the metal-baked crust, which makes sense — glass retains heat longer than metal, so the crust was able to bake further. This is where being able to check your crust color using the clear material comes in handy, especially for fruit pies like apple that can bake for a long time without the filling being adversely affected.

A final trick for perfectly browned crust

More specifically, bake them on a preheated pizza stone or baking steel, which blasts the bottom with a big burst of heat to help the crust set before wet fillings can soak in and make them gummy. Using a metal pan is crucial, though, since it can withstand rapid temperature changes that glass or ceramic pans can’t.

Posted on Leave a reply

Butter vs shortening in pie crust

Butter vs shortening in pie crust

By: RedmanShop | February 7, 2025

Pie crust — gotta love it, right?

Flaky and tender when you nail it, tough as rawhide when you don’t, pie crust divides all of us bakers into definitive categories: those who succeed; those who fail, but keep trying; and those who buy Mrs. Smith’s.

Why is pie crust so tough — often literally? Well, it’s all about the fat, the water, and the flour. Three simple ingredients that, together, can create a masterpiece — or mayhem.

Butter vs. shortening in pie crust: the flour

Flour does make a difference, but not as much as you might think. A lower-protein pastry flour will inherently make a more tender crust (and will also be a bit more fragile when you’re rolling it out).

Truthfully, I use our all-purpose flour in my pie crust; I have to be careful not to work it too hard once the water is added (for fear of developing its gluten), but for me, it offers an ideal blend of good results and ease of handling.

The liquid

Make it ice water. Simple enough, right? Sure, you can use milk, add an egg, and try other types of liquid, but water produces reliably good results — so why not? Ah, now comes the ingredient that arguably makes or breaks a pie crust, and also creates the most debate:

The Fat

Your grandma used lard. Your mom used shortening. You use butter. Are all fats created equal?

I decided to find out.

First thing I did was rule out lard. NOT BECAUSE IT’S NOT A PERFECTLY GOOD FAT AND CAPABLE OF MAKING WONDROUSLY TASTY PIE CRUST. After all, our ancestors made lard-crust pies for centuries and, like lard-fried doughnuts, they were delicious.

I’m ruling out lard simply because good, fresh lard isn’t as universally available as shortening and butter. So if you love lard, and have a good supplier – stick with it.

But if butter and vegetable shortening are your choices, read on.

For years, I’ve alternated between two favorite recipes: Gluten-Free Crustless Pumpkin Pie, a crust made with both shortening and butter; and All-Butter Pie Crust.

One Thanksgiving I’d go with an all-butter crust for my Cranberry Hand Pies​; the next, I’d make my Easy Fall Mini Pies with the shortening/butter clone.

But never had I made both crusts in tandem, and done a side-by-side comparison. Which was flakier? Which tasted better?

Butter makes a lighter crust

I made an amazing discovery (amazing to me; we pie geeks are easily amazed): something I’d always believed to be true was absolutely, categorically, without a doubt not true at all.

I’d always told people that a shortening/butter pie crust would have better texture than an all-butter crust, due to shortening’s higher melting point. Why?

Fat keeps the layers of flour/water “matrix” separated as the pie bakes; the longer fat is present in its solid form (score one for shortening, with its high melting point), the more flakes will form, the more tender/flakier the crust will be.

Now, that may be true. I didn’t actually count the number of flaky layers in each crust.

But one thing was abundantly clear: the all-butter crust (above left) made a lighter crust, with more defined flakes than the butter/shortening combination (above right).

I was totally puzzled until it dawned on me: butter contains more water than shortening.

As the crust bakes, that water is converted to steam, puffing up the crust (and its flakes) like someone blowing up a balloon.

Each fat adds its own distinct flavor

And flavor? The all-butter crust tasted — well, buttery, of course. The butter/shortening crust (which was, by the way, just as tender and flaky as the butter crust, but without its light texture) tasted a bit like butter, and a bit like pie crust — that indefinable something that tells your taste buds, yes, I’m eating a piece of pie.

Both were good — just different. And one of the chief differences was looks: the butter crust produced a very ill-defined edge. My careful fluting basically went up in smoke (er, steam).

So if you’re after looks, stick with the butter/shortening combination (or all shortening). If looks don’t matter to you, I’d go with the all-butter crust.

What about substituting vodka for water?

While I was at it, I decided to test the famous Cook’s Illustrated secret to tender, flaky pie crust: using vodka in place of half the water in the crust.

The theory is that vodka, being alcohol rather than water, will develop flour’s gluten less than plain water, thus creating a more tender crust.

The verdict? I couldn’t discern any difference in the flakiness/tenderness of the vodka vs. non-vodka crusts.

But the vodka crust rolled out more easily; with its silken, smooth texture, it was a pleasure to work with.

So would I add vodka to pie crust? Sure. I think I’ll even keep a little bottle in the fridge, so it’s handy for pie crust or a gimlet — whichever comes first!

OK, I’ve given you a map. And here you stand at the crossroads, ready to make a decision on the butter vs. shortening in pie crust debate.

Posted on Leave a reply

How to make the best pie crust

How to make the best pie crust

By: RedmanShop | February 7, 2025

Four critical ingredients and a few key techniques.

Do you suffer from pie crust phobia? If so, you’re not alone; plenty of otherwise confident bakers find themselves furtively hustling a ready-made crust out of the supermarket freezer case into their shopping cart. But life doesn’t have to be that way; you can make the best pie crust ever by following these simple steps:

  1. Choose a good recipe
  2. Start with the right ingredients
  3. Learn a few basic techniques

What I want to emphasize here is the importance of your ingredients: specifically flour, salt, fat, and liquid. Choosing those four ingredients wisely will lead to consistently great pie crust.

1. Flour: It’s all about protein

What kind of flour makes the best pie crust? Well, not high-protein bread flour! Use that for your chewy bagels. What you want for pie is flour that yields a tender, flaky crust, which means medium-protein all-purpose flour or low-protein pastry flour.

What does protein have to do with it?

When you add water to flour some of its protein turns into gluten, an elastic substance that gives baked goods the structure they need to hold together (and to rise when appropriate). The higher the protein level, the stronger the structure.

Strong structure in yeast bread translates to high-rising; but in pie crust, strong structure can be perceived as tough — the last attribute you want applied to your apple pie. So stick to flour with a medium-to-low percentage of protein, which means all-purpose flour (11.7% protein), pastry flour blend (10.3%), or pastry flour (8.0%).

Does the flour with the lowest protein make the best pie crust?

Not necessarily. Yes, you can make tender, flaky pie crust with pastry flour. But it can be a bit of a challenge, particularly for those uncertain of their pie crust skills. Pastry flour pie crust is harder to roll without cracking, and it can split apart at the seams while the pie is baking.

That’s why I choose all-purpose flour for my pie crust. The dough is easier to roll out and move around and, despite its slightly higher protein, the crust is wonderfully flaky. In my book, the ease of an all-purpose flour crust trumps the marginal added tenderness of a pastry flour crust.

2. Salt: Critical for flavour

Salt adds flavor to pie crust. Leave out the salt and, unless you’re used to following a salt-free diet, the crust will taste like cardboard.

I find that when using unsalted butter and/or shortening in your crust, about 1/2 teaspoon salt per cup of flour is just perfect. If you’re using salted butter, reduce the amount of added salt in your crust by 1/4 teaspoon for each 8 tablespoons (1/2 cup) of butter in the recipe.

Since pie crust dough has very little liquid, choose table salt or fine salt. Their finer crystals will disperse more evenly throughout the dough despite the lack of water to dissolve them.

3. Fat: Choose your favourite

Some people love lard in pie crust. Others use liquid vegetable oil. There are those who swear by their grandma’s Crisco crust — and other bakers who eschew solid vegetable shortening for health reasons. Many people love an all-butter crust. And then there’s coconut oil … So many choices!

Butter is a major flavor enhancer, but its low melting point can be an issue. Shortening, with its higher melting point, adds stability to a baking pie crust.

If you have trouble with your crust slipping down the sides of the pan, or if your carefully fashioned crimp around the edge melts and puddles, blame butter. A combination of butter and shortening yields the best qualities of each: flavor and baking stability.

4. Liquid: The ultimate key to texture

As mentioned before, liquid + the protein in flour = gluten. And once that gluten forms, working it — by mixing the pie crust dough, then rolling it out — increases gluten’s strength and decreases the resulting crust’s tenderness.

The best pie crust is a perfect balance between fat, flour, and liquid. Too much fat and the crust may taste greasy and crumble as it bakes. Too much liquid can create extra gluten, leading to tough, chewy crust.

But strike just the right balance — sufficient fat for tenderness without greasiness, and just enough liquid to hold everything together — and you’ve struck pie crust gold.

Water, milk … vodka?

Some bakers use milk or buttermilk in their pie crust. Thanks to their milk solids, both will help crust brown and add a bit of tenderness. But the classic liquid in pie crust is water — ice water, to be precise.

Why ice water? Ice water keeps the bits of fat in the dough cold and intact (rather than melted and dispersed). This creates little pockets of fat that, as the pie bakes, gradually melt and form tiny caverns in the crust — which we describe as flakiness.

Vodka in pie crust has been a popular substitute for ice water in recent years. Why? It’s said that its lower percentage of water (alcohol is part water, part ethanol) means less gluten development, yielding a more tender crust.

In my experience this is partially true; using vodka in pie crust makes a soft, silky dough that’s lovely to roll out. But the resulting crust isn’t any more tender or flaky than an ice-water crust.

And crust whose liquid is 100% vodka can border on being too tender, since less of its gluten has been activated. An all-vodka crust (especially one made with higher-proof vodka) can occasionally fall apart as you move it from countertop to pie pan.

“Add just enough liquid.” What’s just enough?

Less is more: The less liquid you add to pie crust dough (within reason), the more tender it will be.

When the vodka is thoroughly dispersed, I dribble in ice water just until the dough starts to come together. And I mean just enough water. Watch carefully as you stir; when the dough starts to clump, and you grab a handful and squeeze it and it doesn’t crumble into pieces, stop adding water.

Gather the dough into a ball. Divide it in half, and flatten each half into a hockey puck-like disk. That’s it. You’re done. You’ve just made the best pie crust for Cranberry Hand Pies, Gluten-Free Crustless Pumpkin Pie, Easy Fall Mini Pies.

How to make the best pie crust: your takeaways

  1. Use a reliable recipe.
  2. Choose all-purpose flour or pastry flour.
  3. Don’t skip or reduce the salt; it’s critical for flavor.
  4. Various types of fat work well; choose your favorite.
  5. Add just enough liquid to hold the dough together.
Posted on Leave a reply

Wheat Flour

Wheat Flour

Flour Categories

Flour comes in four categories to cover a variety of bakery products. The Flour classification  refers to its protein level. The protein content is determined by the wheat strain planted by the farmer and the subsequent climatic conditions during growing.

Wholemeal Flour

Protein average: 12% – 14%

High Protein Bread Flour

Protein average: 12% – 14%

Medium Protein Plain Flour

Protein average: 10% – 12% 

Low Protein Cake Flour

Protein average: 7% – 9%

Rye Flour

Protein average: 8% – 15%

Types: Dark Rye, Light Rye

Specialty Flour

Protein average: 12% – 14%

Suitable for Bread, Buns, Pastry, Cakes and Cookies. It can be  used alone but mainly in conjunction with other flour types as a  percentage of the total flour.

Suitable for all types of Bread, Buns and some Pastry.

Suitable for Bread, Pastry, Cakes and Cookies.

Suitable for all types of Cakes, Sponges Cookies and Muffins.  Cake flour can be chlorinated
(It denatures protein and increases absorption) or straight-stream unchlorinated cake flour.

Suitable for bread making on its own or blended with white flour.  The protein differs from wheat flour, containing only Gliadin, resulting in smaller, more compact breads.

Spelt, Einkorn, Kamut and Buckwheat are known as ancient grains. They can be used individually to make bread but are challenging to handle as doughs are sticky. You will blend these with white flour to make bread. Some speciality flours have a gluten-free label.


Flour Type and Availability

The protein content of the harvested wheat will finally determine its category and use. Flour is the base ingredient in a recipe, with each grade playing different roles across product ranges. A specific name often identifies flour types, e.g. all-purpose flour from the medium protein range; and self-rising flour, a medium protein flour containing baking powder.


Country generic names such as Hong Kong Flour are identified with certain dim sum products and are low protein flour. European Flours, very popular with Artisan bakers, use a different system which identifies the flour by its extraction rate, e.g., T45 (like plain flour), T55 (like bread flour), and T65 (high- end bread flour)


The extraction rate relates to the flour obtained from the milling process. Flour with a high number after the T means the flour has a high bran content (minerals) from the milling process.

Posted on Leave a reply

Putting your sourdough starter on hold

Putting your sourdough starter on hold

By: RedmanShop | January 28, 2025

For best long-term storage, dry it

Sourdough baking is endlessly fascinating, isn’t it?

First-time sourdough bakers, excited by the starter they’ve created, happily explore the huge realm of possibilities for its use. 

More seasoned sourdough aficionados, having mastered the basics, work at fine-tuning techniques, learning to use fermentation temperatures to bring out (or tone down) certain flavors in sourdough’s rich, multilayered profile.

But one thing most of us have in common: at some point, we need to put our sourdough baking on hold. Maybe we’re going on vacation; perhaps the schedule is just too crowded at the moment for the ritual feeding/discarding/feeding/baking process.

Whatever the reason, there comes a time when we need to put our sourdough starter to bed for awhile.

What’s the best way to keep your starter happy, healthy, and vibrant, when you know you won’t be using it for an extended period?

Refrigerate it and hope? Freeze it and forget it?

Neither of the above. The best way to preserve your starter – for a couple of weeks, a month, or even years – is to dry it.

Let’s see how the process works.

1. Ready your sourdough starter for storage.

First, feed your starter as though you were going to bake with it. If it’s been stored in the fridge, take it out, and feed it with equal parts unbleached all-purpose flour and lukewarm water. Let it rest, covered, until it becomes very bubbly and healthy looking.

2. Spread it out to dry.

Next, spread it – all of it* – onto two pieces of parchment. It helps to set each piece of parchment on a baking sheet, simply for ease of transportation.

*Don’t want to dry all of it? See the end of this post for advice.

The starter should be spread as thinly as possible; use a spatula, an offset spatula, or a bowl scraper to help the process along.

3. Dry the starter completely, until it’s brittle.

Let the starter dry at room temperature until it’s completely and utterly dry. This will take a day (if you live, say, in Arizona, in a house without air conditioning); or up to three, four, five days – it totally depends on the weather. In Seattle, in winter? Count on a long dry.

If you live somewhere humid, can you dry your starter in the oven? Yes; but be careful. Rather than turning the oven on to warm it, I’d advise using only your oven’s electric light, which will produce very gentle, even heat. You don’t want to risk turning the oven on and accidentally making it too hot, which would kill your starter. (See step #8, below.)

Completely dry starter should peel easily off the parchment; when you pick a piece up, it will be brittle and easily snap between your fingers. If you have a scale, weigh it; if you started with 4 ounces starter on your parchment, it should weigh 2 ounces (or very close) when it’s completely dry.

4. Break it into pieces.

Break the starter into small chips with your hands; or place it in a plastic bag and pulverize it with something heavy.

Can you run it through a food processor? Yes, but it’s not necessary; just break it into chips as best you can.

5. Store it airtight.

Store the starter airtight, preferably in a glass container. You want something totally inert, with an airtight cover; a glass jar is perfect. Date the jar and label it; you don’t want someone throwing it away during the course of some pantry spring cleaning.

Keep the jar of dried starter in a cool, dark place, if possible. Not cool as in refrigerator; just not sitting in the hot sun, or over your woodstove. Be sensible.

6. Bring your sourdough starter back to life.

When you’re ready to revive the starter, measure out 1 ounce (or about 1/8 of it, if you’d been following a regular feeding pattern and had about 8 ounces starter on hand at the beginning of the drying process).

Don’t have a scale? Well, depending on the size of your chips, this will be between 1/4 and 1/3 cup.

7. Mix the starter with lukewarm water.

Place the dried starter chips in a large (at least 1-pint) container. Add 2 ounces (1/4 cup) of lukewarm water. The water should barely cover the chips; tamp them down, if necessary.

Stir the chips/water occasionally; it’ll take 3 hours or so, with infrequent attention, to dissolve the chips.

8. Feed it with flour.

Once the mixture is fairly smooth/liquid, with perhaps just a couple of small undissolved chips, feed it with 1 ounce (about 1/4 cup) of unbleached all-purpose flour. Cover it lightly (a shower cap works well here), and place it somewhere warm.

I like to use my electric oven with the light turned on. Even without ever turning on the heat, it holds a constant temperature between 85°F and 90°F.

You can certainly keep your starter out of the oven, at room temperature; just understand that this whole process, as I’ll describe it, will take longer. The cooler the room, the longer it takes sourdough starter to work.

9. Let it rest somewhere warm until it bubbles.

Let the starter work for 24 hours. At the end of that time, you should see some bubbles starting to form. Remember, this is at about 85°F; if your temperature is lower, this will take longer.

How much longer? Totally depends on temperature. Once you do this process once – in your kitchen, in your climate, accounting for your weather – you’ll have a better idea.

Sourdough isn’t one of those things you can be all engineering about. Forget your timer; just wait until your starter looks like the picture above.

10. Feed the starter again.

WITHOUT DISCARDING ANY OF THE STARTER, feed it with 1 ounce of lukewarm water, and 1 ounce of flour. Cover, and put back in its warm spot. After “X” hours (depends on your kitchen), you should see some serious bubbling; mine took eight hours to become nice and bubbly.

11. And again.

Feed the starter again – 1 ounce of lukewarm water, 1 ounce of flour – cover, and wait. Again, you’re not discarding any at this point.

Here’s my starter 12 hours later. It’s exhibiting a host of tiny bubbles, and has expanded. You may also notice, from the side of the container, that it’s risen, and then fallen; this is completely natural.

12. Put the starter back on its regular feeding schedule.

Your starter is ready to return to its former life – and its regular schedule. DISCARD all but 4 ounces (about 1/2 cup). Feed it again, this time with 4 ounces each lukewarm water and flour. (That’s 1/2 cup of water, and 1 cup of flour, for those of you without a scale. Tell me again why you don’t have a scale?)

This time, it should really expand quickly. In my 85°F oven, it took just 4 hours for it to triple in size. Your starter is now revived and healthy.

13. At last – you’re ready to bake!

To ready the starter for baking (while saving enough for another day), feed it again. Discard all but 4 ounces; and feed the remainder with 4 ounces each lukewarm water and flour. Let it become bubbly – and let the baking begin!

Finally, because I know you’ll ask –

Q. Do you have to dry all of your starter?

A. No. Store half in the fridge, if you like. Just don’t store any in the freezer; freezing will kill your starter (more on that in a future post).

Q. If you dried all of your starter, and you only revive 1 ounce of it – what do you do with the rest?

A. Give some to a friend (with a link to this blog post, of course). Or just save the rest for sometime in the future.

Q. How long will dried starter stay good?

A. Not sure, but we’ve heard cases of dried starter remaining viable for over a decade. Thorough drying should preserve your starter indefinitely – just ask King Tut!

Finally, I couldn’t possibly end this post without showing you what happened to my dried, revived, fed, and baked-with starter. This Extra-Tangy Sourdough Bread has NO commercial yeast; it was entirely leavened with my reconstituted starter. Success!

Posted on Leave a reply

How to measure flour the right way

How to measure flour the right way

By: RedmanShop | January 22, 2025

If you learn one skill to bake better, it should be how to measure flour — the right way. It’s arguably one of the biggest keys to baking success. That’s because a little too much flour can be the difference between a good bake and a not-so-good bake. And if you’re measuring your flour by volume (i.e., with measuring cups), then it’s very likely you’re adding too much flour.

That’s because measuring flour by volume is wildly inconsistent: It all depends on how densely the flour is packed into the cup. If the flour is more condensed, a cup can hold up to 160 grams of all-purpose flour. If you fluff, scoop, and level, as we recommend, a cup will hold around 120 grams. But if you weigh your flour with a scale? You’ll always get exactly 120 grams of all-purpose flour per cup, precisely as our Test Kitchen (or whoever developed your recipe) intends.

If you succeed in correctly measuring your flour, your baked goods are more likely to be successful, too. And while we recommend always using a scale, using measuring cups works too if you do it the right way. However you choose to measure your flour, here’s how to get it right.

With a scale, your measurements are always accurate.

How to measure flour with a kitchen scale

Hit the “Tare” button to make sure your scale is set to 0 grams. (All of our recipes include gram and volume measurements.) Set your measuring bowl, or a separate empty bowl, measuring cup, or other vessel (whatever you’ll be pouring your flour into) onto the scale, then press “Tare” again to set the scale to 0 grams. Scoop your flour into the vessel on the scale — if you’re measuring 1 cup of all-purpose flour, keep scooping until the scale totals 120 grams. Or measure out however much flour the recipe calls for. (Wondering about the weight of other flours and ingredients? Check out our handy ingredient weight chart.)

Generally, you can stay within 5 grams over or under the written amount (for instance, if the recipe calls for 240 grams of flour and you measured out 245 grams), and it won’t affect your recipe. With that said, we recommend being as accurate as possible when measuring flour and all other ingredients.

How to measure flour with measuring cups

If you don’t have a scale and need to measure flour by volume, it’s important to use the correct technique. Using our “Fluff, Sprinkle, and Scrape” technique is the best way to make sure you do not add too much flour to your recipes.

Begin by fluffing your flour in its bag or container using a spoon or scoop. The goal here is to lighten and aerate the flour. Spoon the fluffed flour into your measuring cup until it’s overflowing. Use a straight edge (like the back of a butter knife or a bench knife) to evenly level off the top so the flour is even with the top of the measuring cup.

Posted on Leave a reply

Bulk fermentation, explained

Bulk fermentation, explained

By: RedmanShop | January 22, 2025

Bulk fermentation (also called the first rise or primary fermentation) is one of the most important steps of yeast bread baking. It begins right when mixing ends and lasts until the dough is divided and preshaped. The name signifies exactly what it is: the step when the dough is fermenting in a large, single mass.

During this time, fermentation creates organic acids and carbon dioxide gases, each of which plays an important part in dough development. Organic acids are primarily what give the dough flavor and strength (acids help condition the gluten network) and carbon dioxide gives the dough volume and lightness.

While our friendly yeast and bacteria are doing most of this work, the dough still benefits from a periodic check-in by the baker. We help regulate dough temperature and strength through a series of folds, and these check-ins also give us an opportunity to assess how the dough is progressing.

Why stretch and fold?

Folding helps add strength to bread dough through a very simple series of actions: stretch the dough out and over itself. This act of stretching and folding, which takes just a few moments, helps develop the gluten network in the dough. Each fold has a significant impact on dough strength.

Through folding, we’re also helping to regulate dough temperature throughout the entire bulk mass. This ensures the dough’s temperature is relatively even throughout — no cool or warm spots at the top or bottom.

And finally, at each set, we have a chance to handle the dough and gain a firsthand assessment on how it’s developing: is the dough sluggish because it’s cool in the kitchen? This means we might need to extend bulk fermentation. Is it strong enough for preshaping or does it need another set of folds? By interacting with the dough in this way, we have an opportunity to answer these questions and adjust course as necessary.

When should I stretch and fold?

This process works best when you perform a quick series of folds and then let the dough rest. In the left-hand image below, you can see the dough bunched tightly in the center after performing a set of stretches and folds. In the right image, you can see it relaxed after a 30-minute rest, ready for another set of folds.

If you try to perform another set too soon, you’ll find the dough is too tight. It’ll be hard to stretch and may even tear. For most doughs, I find spacing out each set by 30 minutes (with the first set happening 30 minutes after the beginning of bulk fermentation) to be just right.

How to fold bread dough

There are many ways to fold bread dough, but my preference is to perform them directly in the bowl. First, get a small bowl filled with water and place it next to your bulk container. Dip your hands in the water before folding to prevent excessive sticking.

You will perform the same up-and-over motion four times, turning the bowl after each fold. As shown above, use two wet hands and grab the side of the dough farthest from you, then lift it up and over to the side nearest your body. Next, rotate your container 180°, wet your hands again if necessary, and perform the same stretch and fold. Next, rotate your container 90°. Grab the side of the dough farthest from you; once again stretch it up and over to the side of the container nearest your body. Rotate your bowl 180° and perform the same fold one final time.To finish the set, I like to gently pick the dough up in the center and let the ends fold under just a little. This helps keep the dough tidy in the middle.

When to end bulk fermentation?

Finding the exact point when to end bulk fermentation takes practice. With time, you’ll learn to read the signs of sufficient fermentation: dough strength, elasticity, smoothness, volume gain, and bubbly appearance.But making this call can be difficult. Cutting bulk fermentation short might mean your dough won’t be sufficiently fermented and you’ll head toward an under-proofed result. On the other hand, if you push bulk fermentation too far, your dough will be hard to handle and on the verge of over-proofing. There’s a balance to be found.Upper left: dough at the beginning of bulk fermentation. Upper right: dough before first stretch and fold. Lower left: dough before second stretch and fold. Lower right: dough at the end of bulk fermentation.

In the image above, see how it initially starts as a shaggy mass, but eventually rises significantly and becomes smooth, strong, and bubbly?At the end of bulk fermentation, I look for a dough that’s risen significantly and is much smoother than when bulk started. If you tug on the dough a little with a wet hand, you’ll feel resistance and elasticity.Additionally, look for liveliness. Gently shake the bowl and it’ll jiggle, letting you know there’s plenty of aeration in the dough. These are all great signs that the dough has fermented sufficiently and is strong enough to be divided.Strong fermentation, sufficient dough strength, ending bulk fermentation at the right time, and a full proof – these are all steps required for a wonderful loaf of bread. And as you develop a sense for how to execute on each of these, you’ll taste the difference in every bite.

Subscribe to our Newsletter Now

Get the latest recipes, products and classes available on RedManShop.