FREE DELIVERY ABOVE $60

Posted on Leave a reply

Using the chocolate tempering machine

Using the chocolate tempering machine

By: izzah zainal | February 15, 2025

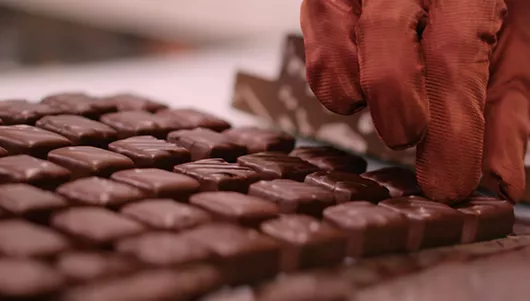
Need a large quantity of workable chocolate? Then it’s best to use the chocolate tempering machine.

Good To Know:

Why is fluidity so important?

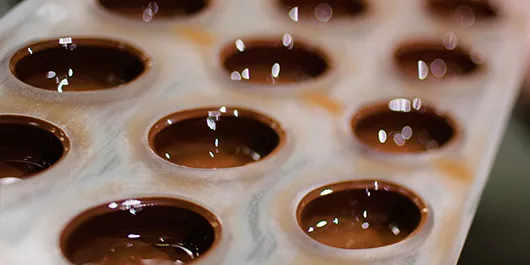
The fluidity of your chocolate determines the thickness of the shell and the snap of your chocolate products: the more fluid your chocolate, the thinner and crunchier your shell will be.

Using chocolate with the right fluidity also saves time: you can cast large moulds in one go with less fluid chocolate. Chocolate with a higher fluidity is better for moulds with a lot of detail, but you’ll need to fill your mould with chocolate 2 to 3 times.

Why is it so important to pre-crystallise chocolate properly?

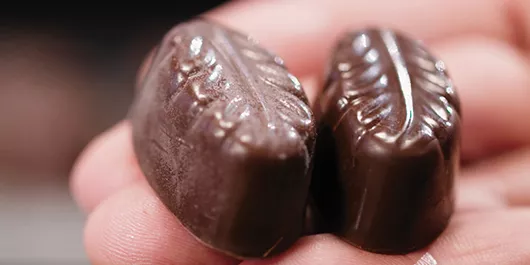
It helps chocolate harden, and gives it a beautiful satin gloss and a delicious snap. It makes chocolate contract during cooling, which makes it easier to unmould. Badly crystallised or uncrystallised chocolate will turn grey and won’t have an appetising gloss.

What is tempering or pre-crystallising?

The purpose of tempering chocolate is to pre-crystallise the cocoa butter in it, which is important to make your chocolate ready for processing. During tempering, the cocoa butter in the chocolate takes on a stable crystalline form. This guarantees a perfect finished product with a satin gloss and a hard snap. It also makes the chocolate contract during cooling, which makes it easier to unmould. If chocolate is simply melted (between 40 and 45 °C) and then left to cool down to a suitable working temperature, the finished product will not be glossy. If you make the small effort of bringing your chocolate to the right working temperature properly, you are guaranteed to get the desired end result. And that’s what we mean by tempering: bringing chocolate up to the right working temperature while making sure that the crystalline structure of the cocoa butter in it is stable. As you’ll discover below, the three key principles for proper tempering are time, temperature and movement.
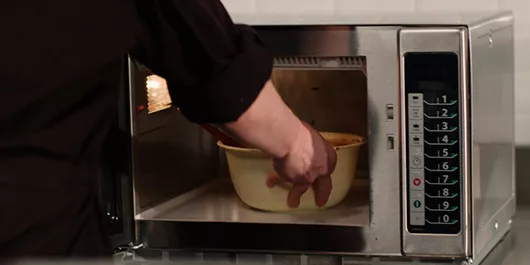
Step 1

Pour a small amout of chocolate into a plastic or glass bowl.

Step 2

Place the bowl in a microwave and melt the chocolate at 800-1,000 W.

Step 3

Take the chocolate out of the microwave every 15 to 20 seconds and stir well to make sure that the heat is distributed evenly throughout and to keep the chocolate from burning.

Step 4

Repeat this procedure until the chocolate has almost entirely melted. Some small pieces of chocolate should still be visible in the bowl.

Step 5

Take the bowl out of the microwave and stir the chocolate well until all the pieces of chocolate have disappeared. You’ll notice that your chocolate is now smooth and slightly thicker. That means it is properly tempered and ready for use.

Which chocolate needs to be tempered?

Each variety or type of chocolate should be tempered before you use it to mould chocolates and hollow figures, or to enrobe cakes and chocolates. In short, whenever chocolate needs to have a beautiful satin gloss and a hard snap, tempering is absolutely crucial.

When you add chocolate to dishes as a flavour component (e.g. chocolate mousses or bavarian creams), it suffices to simply melt it without tempering. All our recipes clearly indicate if your chocolate should be tempered or not.

A general overview of baking pan materials

The biggest distinction between pans is heat transfer. Metal conducts heat the most efficiently — in other words, it gets hot the quickest and transfers heat evenly across the pan’s surface — which is why many professionals choose aluminum pans. (Another benefit: Metal pans withstand rapid temperature changes, meaning you can take your pie plate from the fridge to the oven without worrying about shattering.)

Glass, on the other hand, is an insulator. Because glass slows the flow of heat between the oven’s air and your dough, it takes more time to heat up than metal — meaning your dough takes longer to heat too. But once it’s hot, it retains that heat well, and it stays hot for longer than metal. For pie, there’s one more bonus: The clear material means you can visibly check how brown your crust is getting.

Ceramic pie pans are usually either stoneware or porcelain, and they can vary based on the material and how it’s made. They can also vary in thickness and thus heat transfer, so ultimate performance depends on which brand or maker you’re baking with. Overall, though, they tend to be slower to transfer heat than more efficient metal pans, though they retain heat well.

Posted on Leave a reply

How to store chocolate products

How to store chocolate products

By: izzah zainal | February 7, 2025

Bad storage will have a negative impact on the quality of your finished product. To prevent this from happening, we show you the ins and outs of the proper storing procedure.

Good To Know:

Why is it so important to store your chocolate creations in the right conditions?

Constant storage temperatures are essential to slow down the white-greyish discoloration (i.e. fat bloom) that naturally appears on the chocolate’s surface.

Avoid temperature shocks since they may cause sugar bloom.

Storing chocolate in a space that is too humid or too cold may expose it to condensation, often causes sugar bloom.

Never store chocolate near strong-smelling products as chocolate has the tendency to absorb odours.

How can you slow down the appearance of fat bloom?

Store your finished chocolate products at a constant temperature between 18°C and 20°C. Fat-based fillings (e.g. pralines or nut-based fillings) will make fat bloom appear faster. You can prevent this by adding 5% to 6% cocoa butter to your filling and then pre-crystallising (or tempering) it.

What causes sugar bloom?

Temperature shocks, or storing chocolate in a space that is too humid or too cold (thus exposing it to condensation) in many cases gives rise to sugar bloom.

Posted on Leave a reply

How to make chocolates in a mould

How to make chocolates in a mould

By: izzah zainal | February 7, 2025

Eager to get started on those beautiful moulded chocolates? This step-by-step breakdown will help you achieve the perfect end result.

Good To Know:

What should you take to heart when making moulded chocolates?

Use polycarbonate moulds. These yield the best gloss and contract slower than chocolate, making unmoulding far easier. Choose a fluid chocolate: a three-drop or four-drop fluidity is ideal. Heat the moulds briefly before pouring in your chocolate. This way, you’ll avoid temperature shocks that could make your chocolate turn grey afterwards.

Make sure that your filling is smooth and fluid enough to pipe easily. Also check that it isn’t warmer than 28°C, otherwise the filling will make your chocolate shells melt. Try to avoid making smudges on the rims of your chocolate moulds with the filling as they may cause leaks in your chocolate shells. Always fill each chocolate shell individually. Never fill the chocolate shells to the brim. Leave a 1.5-mm opening from the top, otherwise it would be impossible to seal your chocolates properly.

Needed:

  1. Moulds for chocolates (pralines), preferably in polycarbonate
  2. A ladle
  3. Chocolate melter or tempering machine
  4. A small palette knife
  5. A chocolate scraper
  6. Sheet of paper

Step 1

Temper the melted chocolate.

Step 2

Warm your chocolate mould with a heat gun to a temperature of 26 to 27°C, but make sure it doesn’t become warmer than your tempered chocolate.

Step 3

Fill the mould with tempered chocolate. Hold the mould at an angle and scrape off the excess chocolate from the top and sides of the mould.

Step 4

Tap the mould firmly against your worktop to remove any air bubbles from the chocolate.

Step 5

Pour the chocolate back into the melter, but make sure that all sides and corners of the mould cavities are evenly covered with chocolate.

Step 6

Scrape off the excess chocolate from the top and sides of the mould again.

Step 7

Let the chocolate set for about 5 minutes: put the mould on a sheet of paper with is open side facing down and allow the excess chocolate to drip onto it (until the dripped out chocolate begins to set).

Step 8

Scrape off the excess chocolate one last time and leave the chocolate to harden in a refrigerator at 14 to 16°C for a few minutes. The chocolate shells are then ready to be filled with a ganache, praline or other filling.Which type of chocolate is best suited to create moulded chocolates?

For a medium thick chocolate shell:

All chocolate types with a basic three-drop fluidity are right about perfect. They make it easy to create a chocolate layer with the perfect thickness and minimise the chance of having unwanted air bubbles, especially in comparison with more fluid chocolates.

For a fine chocolate shell:

Some chocolate lovers and craftsmen want the chocolate shell of their moulded chocolates to be as fine and crunchy as possible. A more fluid chocolate with a 2% to 4% higher cocoa butter content is absolutely perfect for this. You can easily recognise these types of chocolate by the four-drop symbol indicated on their packaging.

Subscribe to our Newsletter Now

Get the latest recipes, products and classes available on RedManShop.