FREE DELIVERY ABOVE $30

Posted on Leave a reply

The Sweet History of Chocolate

The Sweet History of Chocolate

By: RedmanShop | June 26, 2025

From Mayans to Modern Day

Chocolate has shaped the way we celebrate, gift, and indulge. It’s the star of our desserts, the ultimate comfort good and a go-to for birthdays, anniversaries, and everything in between. Now, everyone knows that chocolates originate from cacao beans, but have you ever wondered how they became the treat we love today?

At RedMan, we believe a rich flavour deserves an equally rich backstory. So, welcome to your special crash course in cocoa: The Sweet History of Chocolate! A bite-sized journey through chocolate’s evolution… Told through the ages, one delicious fact at a time.

The Discovery of Chocolate (1500s and earlier)

Before it became the creamy dessert we know today, chocolate began as a sacred plant hidden deep in the rainforests of Mesoamerica, now known as present-day Mexico. Over 4,000 years ago, the Olmecs were among the first to discover cacao beans, where they crushed the cacao pods and used them in ritual, ceremonial or medicinal drinks.

Fast forward a few centuries and the Mayans fully adopted and embraced the cacao culture. They didn’t just enjoy cacao like the Olmecs, the Mayans worshipped it as one of their gods. Cacao beans were so prized, they were used in religious rituals, traded as currency, and even buried with the dead to accompany them to the afterlife. Drinking their chocolate (which was still far from the sweet version we know) was a symbol of status, power, and divine favour.

The “Xicolatl” Drink

Imagine a foamy, bitter, spiced chocolate mixture instead of your usual hot cocoa. That’s what was known as, “Xocolatl,” the early versions of a chocolate drink from the Aztecs. Made by grinding roasted cacao beans with chilli, cornmeal and water… This thick beverage surely packed a flavourful punch. If you’re curious to try something similar, check out our list of suggested ingredients commonly associated with the drink! Feel free to explore recipes online and adjust the ratios to suit your taste (or courage)!

Chocolate Reaches Europe

It’s safe to say the deliciousness and cultural influence of chocolate couldn’t be contained for long. When Spanish explorers set foot in the Americas in the early 1500s, they brought back cacao beans to Europe, where it caused quite a stir amongst the aristocracy. But to European palates, the bitter brew from the Aztecs was too intense, so they got creative.

By adding cane sugar, honey, vanilla, and even cinnamon, this new, European mixture was a sweeter, silkier and smoother version of the Aztecs’ “Xocolatl” drink. It wasn’t long before it gained popularity in royal courts and high society circles, a luxury only the rich could enjoy. Hailed not only for its health benefits but for its high status and exclusivity. If you want to sip like the aristocrats did, here’s a suggested list of ingredients that mimic the style of the early European chocolate drink! And again, feel free to browse various recipes online to match your desired richness and sweetness.

If you need a more convenient and fast method for making some indulgent hot chocolate, just combine warm milk with ready-made powder! Check out the Ruby Chocolate Drink Powder, Hot Cocoa Double Chocolate or Instant Cocoa Drink Powder available at RedMan’s website.

The Development of Chocolate Till Today

Until the 19th century, chocolate was mostly something you drank… But in 1847, British company J.S. Fry & Sons mixed cocoa butter, cocoa powder, and sugar to create a firm, mouldable version: the first chocolate bar! Safe to say that over time, many Swiss chocolatiers perfected chocolate to be finer, smoother and glossier. This era gave rise to giant chocolate companies and transformed chocolate from a sacred drink to snackable delights.

Today, chocolate comes in many forms and even flavours: there’s Dark Chocolate for the bold, Milk Chocolate for the nostalgic and White Chocolate for the sweet-toothed. We’re all exploring new flavours with chocolate, and bringing the ingredient to new heights.

Melt it, mix it, drizzle it, and most importantly, share it!

Want to bake something delicious from our classes or looking for inspiration for your next chocolate dessert? Head over to our Instagram and tag us @phoonhuat to share your sweet creations! Don’t forget to use the hashtag #phoonhuat on Facebook, Instagram, and TikTok so we can cheer you on! RedMan Singapore is always welcoming new baking enthusiasts into our community so hop onto our social media pages and let’s support each other!

Posted on Leave a reply

Dads Deserve Desserts, Too!

Dads Deserve Desserts, Too!

By: RedmanShop | June 25, 2025

Father’s Day Bakes and Bonding Moments that Hit the Sweet Spot

We all know and appreciate a father who gives the most for his loved ones, day in and day out. From morning kopitiam runs to late-night sessions with school projects, they’re there. Always. Now with Father’s Day coming up, maybe it’s time to step out of your comfort zone and rethink the gifting of cologne or the classic “Best Dad” mug.

So, what’s the best way to make this special day truly meaningful? It may not have to come from the store… but how about the kitchen? At RedMan, we believe the sweetest moments come from what we create together. That’s why we’re inviting fellow parents (and kids) to turn this Father’s Day into a memory-making adventure! One that smells like freshly baked goods and sounds like fun laughter.

This year, we’re not just honoring dads, we’re making memories. From the kitchen counter to the dining table, we’ve got recipes and some special activities to sweeten your celebration!

Why Dad Deserves Something Sweet

They may not always say much, but dads have a way of showing love in the simplest, most powerful ways. Whether it’s the quiet nod of approval, the jokes that land (or don’t), or the silent fixing of things in the house… Dads have their own special brand of care. While they may not always ask for much, Father’s Day is the perfect excuse to give back to his years of endless love and care. It doesn’t have to be a big or grand gesture because something small, personal and made with the heart already evokes a thousand words.

Baking Recipes to Make Dad Smile

Whether you’re planning to surprise Dad with a handmade treat or invite him into the kitchen for a bonding activity, these recipes are the perfect way to say, “I appreciate you.” From sweet tooth cravings to health-conscious desserts, we’ve got a little something for every kind of father figure. A dessert made with love is always better than anything store-bought.

1. Healthy Blueberry Banana Muffin

If Dad’s watching his diet but still sneaks a treat, these Healthy Blueberry Banana Muffins are a sweet yet nutritious compromise. Packed with natural ingredients and lightly sweetened with real fruit, they hit the spot without the sugar crash. Perfect for breakfast, tea time, or post-gym snacking, bake a batch and make some sweet memories together. Get the recipe!

2. Home-made Chicken Ham Cheesy Pizza

For the father who loves turning cooking into a fun bonding session, this Chicken Ham & Cheese Pizza is the perfect weekend project to share with your little sous-chef. From stretching the dough together to sprinkling the gooey cheese on top, it’s hands-on, kid-friendly, and oh-so-satisfying. No fancy gear needed, just a home oven (or toaster oven) and a few simple ingredients. Get the recipe!

3. Non-Bake Cheesecake

A classic dessert that’s as rich and reliable as Dad himself. Smooth, creamy, and irresistibly satisfying, this Non-Bake Cheesecake recipe is perfect for those craving a creamy yet powerful treat. With no oven involved, it’s a great pick for little bakers to help assemble and decorate too. Finding someone who doesn’t like cheesecake is nearly impossible so this one’s a guaranteed win for dessert fans of all ages. Get the recipe!

4. Gluten-Free Breakfast Pancakes

Whether Dad’s on a healthy diet or just appreciates a lighter meal to start the day, our Gluten-Free Breakfast Pancakes bring the perfect balance of nutrition and indulgence. Stack them high, drizzle with honey or fruit, and turn your Sunday morning into a full-on Father’s Day breakfast celebration. The best part? Everyone can join in on flipping duties! Get the recipe!

Bake It Together: RedMan’s Parent & Child Classes

If you ask any dad what he wants for Father’s Day, chances are he won’t say much. But if you ask him what his best memories are, they’re usually the simple and shared moments with the kids. Those are exactly the kind of moments RedMan’s Parent & Child baking classes are designed to create!

No baking experience? No problem. These sessions are fun, beginner-friendly, and guided by expert instructors who’ll make sure the experience is equal parts learning and laughter. You’ll walk away with unforgettable memories with tasty creations in hand.

Cake Push Pop Baking (Parent & Child Class)

In this playful, intimate, and hands-on class, learn how to layer fluffy cake, cream, and toppings into fun push pop containers! This session is a great way to let your personalities shine while decorating together. Book the class!

Animal-Themed Madeleines Baking (Parent & Child Class)

Create some butter madeleines in this sweet animal-themed session! Perfect for younger kids and parents looking for a relaxed, beginner-friendly bonding activity. Expect lots of smiles and maybe a few cookie ears accidentally eaten mid-decorating. Book the class!

In the end, Father’s Day may not come with as many flowers or fanfare, but it’s just as deserving of joy, love, and celebration. With this article, we hope you’ve gathered some motivation and devote this Father’s Day to honour the dads, grandpas, and father-figures who’ve always been there.

Baked something delicious from our classes or looking for inspiration to surprise your dad? Head over to our Instagram and tag us @phoonhuat to share your sweet creations! Don’t forget to use the hashtag #BakeForDadSG on Facebook, Instagram, and TikTok so we can cheer you on! RedMan Singapore is always welcoming new baking enthusiasts into our community so hop onto our social media pages and let’s support each other!

Posted on Leave a reply

The Official Mother’s Day Baking Bingo

The Official Mother’s Day Baking Bingo

By: RedmanShop | May 22, 2025

Because Mum Deserved the Laughs (and the Dessert)

In the spirit of celebrating the amazing women in our lives, we wrapped up this Mother’s Day with something a little extra sweet: the official RedMan Mother’s Day Baking Bingo! A super fun, lighthearted, and very entertaining game that celebrated the sweet (and slightly chaotic) moments that always happen when love, flour, and family mix. After all, we all knew we needed a dessert for this special day, so why not create a fun and loving memory out of it? Inspired by the universal bond of baking with your loved ones, we successfully combined the classic game with the joys of family kitchen moments… So how many squares did you tick off?


How Did Your Mother’s Day Baking Bingo Go?

If you joined the fun, you knew the rules were simple: Each player grabbed a copy of the scorecard (below) and for every square, the winner was determined when someone covered 5 of those squares in a vertical, horizontal, or diagonal row!

Don’t worry if you missed it, too! You can still download the printable version of our Bingo sheet and share the fun with your mum.


At the heart of the game was the chance for you and your mum to enjoy yourselves in the kitchen and spend some meaningful time together. Every square ticked off became a sweet and joyful reminder of a special moment shared between the two of you, and we hope those little moments turned into lifelong memories you’ll cherish.

You embraced the chaos, indulged your sweet tooth, and made the most of every moment with her. At the end of the day, every mother deserved the best memories and you had the chance to create some beautiful ones together!


Bonus Points: Baked These and Scored Extra Love!

Did you both go all out? Baking one of these meant you automatically checked off a few extra squares!

Other Ways to Celebrate Your Mother’s Love

After you had your fun with Bingo, we have even more to share! We kept the celebration going by capturing the little moments that reflected her love. The sounds, the laughter, the satisfying moments that made you feel at home… We’re proud to say we showcased that feeling in our special satisfying video reel which symbolised a mother’s love language through these lovely baking shots.

Baked something delicious from our Bingo card or looking for more inspiration to surprise your mum again? Head over to our Instagram and tag us @phoonhuat to share your sweet creations! Don’t forget to use the hashtag #BakeForMumSG on Facebook, Instagram, and TikTok so we can cheer you on! RedMan Singapore is always welcoming new baking enthusiasts into our community so hop onto our social media pages and let’s support each other!

Posted on Leave a reply

Yeast – Baker’s & Natural

Yeast – Baker’s & Natural

By: RedmanShop | February 17, 2025

Baker’s and Natural Yeast

Baker’s and Natural are two types of yeast more commonly used in baking, each providing the basis for dough fermentation. Yeast requires special conditions for it to perform consistently throughout the fermentation process. Yeast growth is shown by its increasing capacity to multiply and bud. The conditions necessary for its growth are water, food, oxygen, time, temperature, and appropriate acidity/alkalinity level (pH).

Baker’s Yeast

Baker’s Yeast is a commercial product available in several forms, such as low-sugar or high sugar-tolerant varieties. The choice of which yeast will depend on the dough’s sugar levels. Low sugar yeast works well up to 10% sugar content, whereas high sugar yeast works best in doughs with above 10% sugar content. To check the Percentage of sugar in the recipe, use the Bakers Percentage calculation method, as explained in Part Two.

Types of Yeast

Compressed : Block form is the most common. It is also available in flakes for larger plant bakeries.

Dried Yeasts: Instant Dried / Instant Active DriedStrains of yeast that have had the water removed. The yeast is re-activated by mixing with warm water. It is added directly into the dough when it is mixed.

Note: To convert fresh yeast usage to dried yeast, multiply the quantity by 0.4.

High and Low Sugar Yeasts

The type of yeast used in the dough relates to the amount of sugar in the formula. For lean dough formulas, sugar will range from 0% – 10% on the flour weight. In rich sweet dough formulas, sugar can be 12% to 20% of the flour weight. The high sugar yeast strain is required in these doughs as regular yeast will not be able to create enough fermentation activity. The dough would move slowly as low-sugar yeast cannot cope with high-sugar levels.

Storage

For dried yeasts, refrigeration in airtight containers is most suitable. Fresh compressed yeast also needs refrigeration and is wrapped in appropriate paper to prevent it from drying out. Buy small packs until confident so as not to waste ingredients. Do not purchase large pack sizes (500g) at first, as they deteriorate with age.

Must Know

Yeast is a living organism and requires attention to detail to obtain a consistent result. Buying yeast in individual small sachets is recommended rather than a large amount. Once opened, its gassing properties deteriorate.

Natural Yeast – Levain (Sourdough)

A mix of flour and water (equal parts) stands in a clean container to attract the wild yeast cells and organic bacteria in the air. Once evidence of activity (bubbles or air pockets visible), a regular feeding process using equal parts of flour and water begins. The action is repeated for the next seven days. The result is that Levain replaces baker’s yeast for dough fermentation. For further details refer to page 71, Part Three on practical baking.

Storage

It is best kept refrigerated during the building stage and upon completion of the starter. Any leftovers from daily production must be returned to the mother and kept under refrigeration.

Must Know

Building the Levain is a slow and steady process requiring care so that the foundation is solid and healthy. Once you have the Levain, you must feed it so it is ready for use before making the dough. The flour used in the starter and feeding must be unbleached, with the most suitable being a medium protein.

Fermentation

Yeasts are used as an aerator, affecting product structure, flavour, volume, and quality. The yeast’s performance depends on the amount of water, its temperature, and the finished mixing temperature. It will be challenging to control this process as it could move too quickly or slowly at times, so it is crucial to have a clear understanding for success to follow.

Posted on Leave a reply

How to achieve your perfect chocolate chip cookie

How to achieve your perfect chocolate chip cookie

By: izzah zainal | February 16, 2025

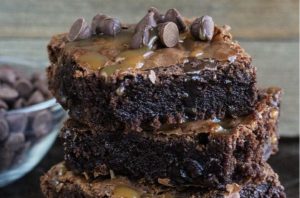
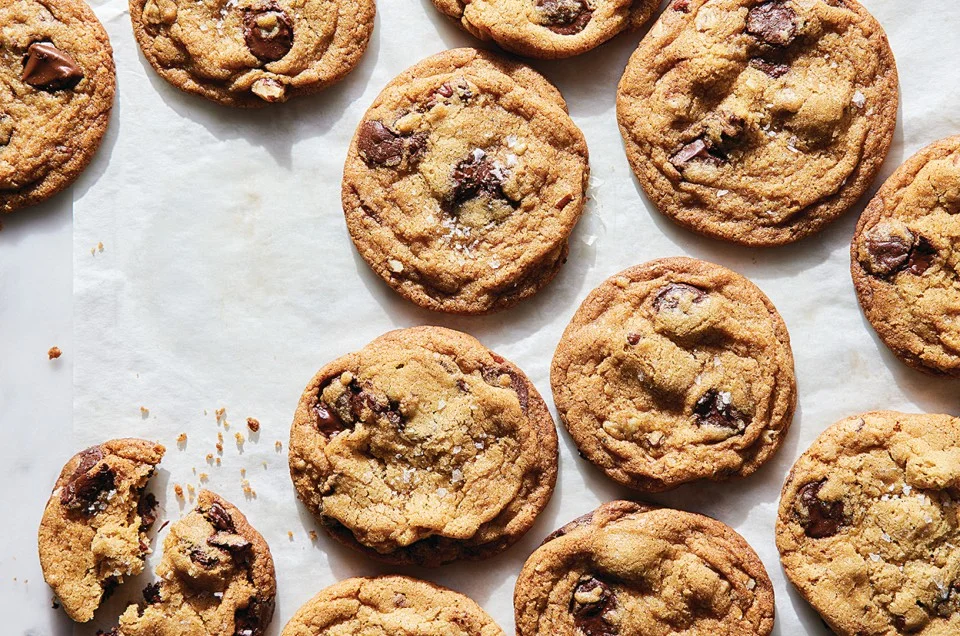
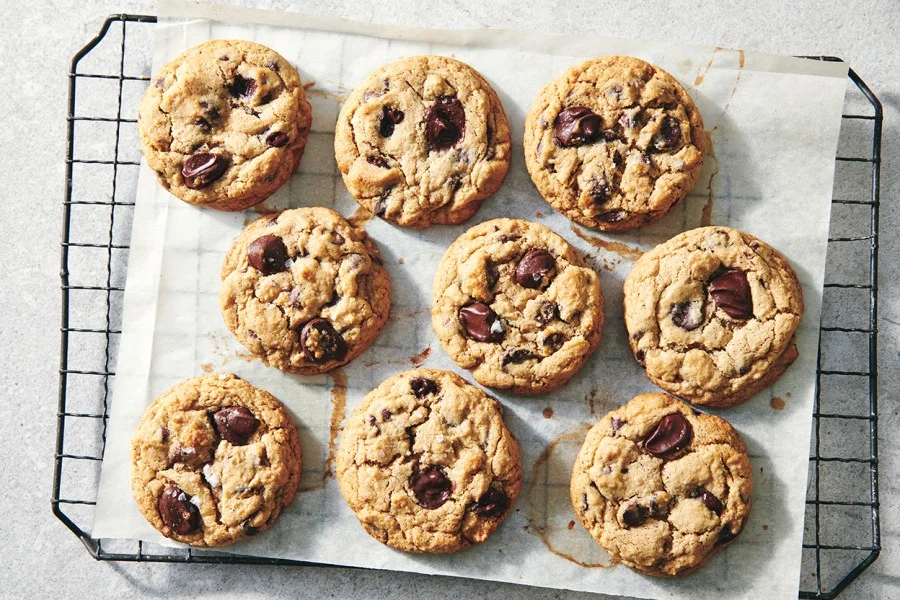
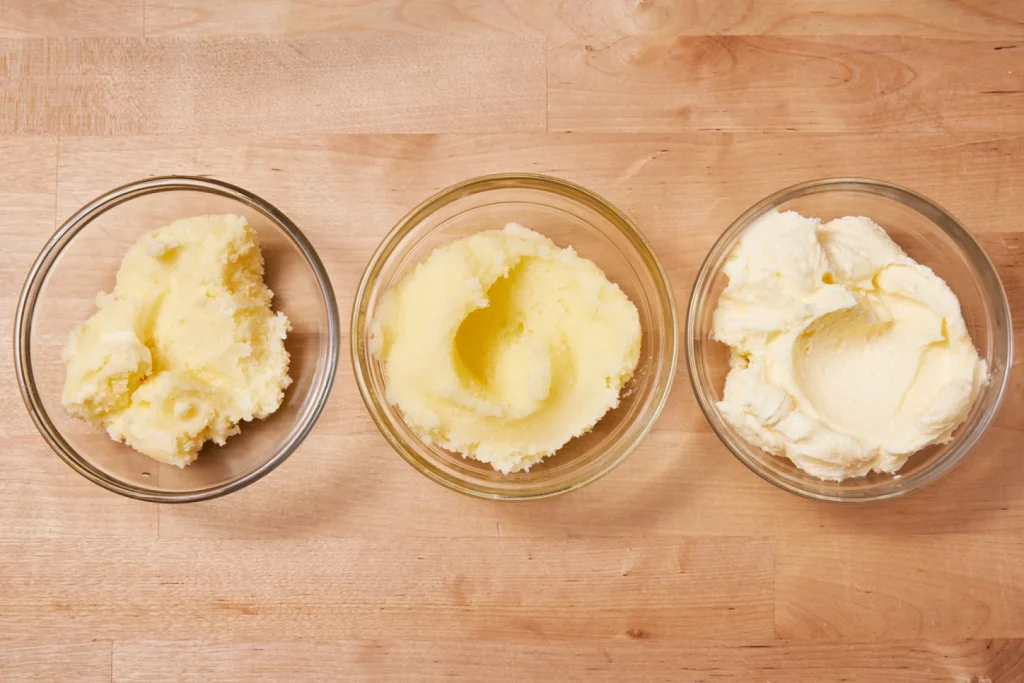
A few tweaks — more sugar, a dash of milk — can make cookies crispy, chewy, or cakey.

Good bakers know how to follow recipes. Great bakers know how to tweak them — how to deviate subtly from the printed word and create something that’s not just tasty but tailor-made to your palate. The line between good and great is surprisingly easy to navigate when it comes to chocolate chip cookies. All you need is a little cookie science and a friendly guide to show you the way.

Just a few simple changes can turn a regular chocolate chip cookie into one that’s extra-crunchy, extra-chewy, or extra-cakey. We recommend using our Easy Chocolate Chip Cookies recipe, but these tips are broadly applicable to chocolate chip cookie recipe that makes a similar quantity of finished cookies.

How to make crunchy chocolate chip cookies

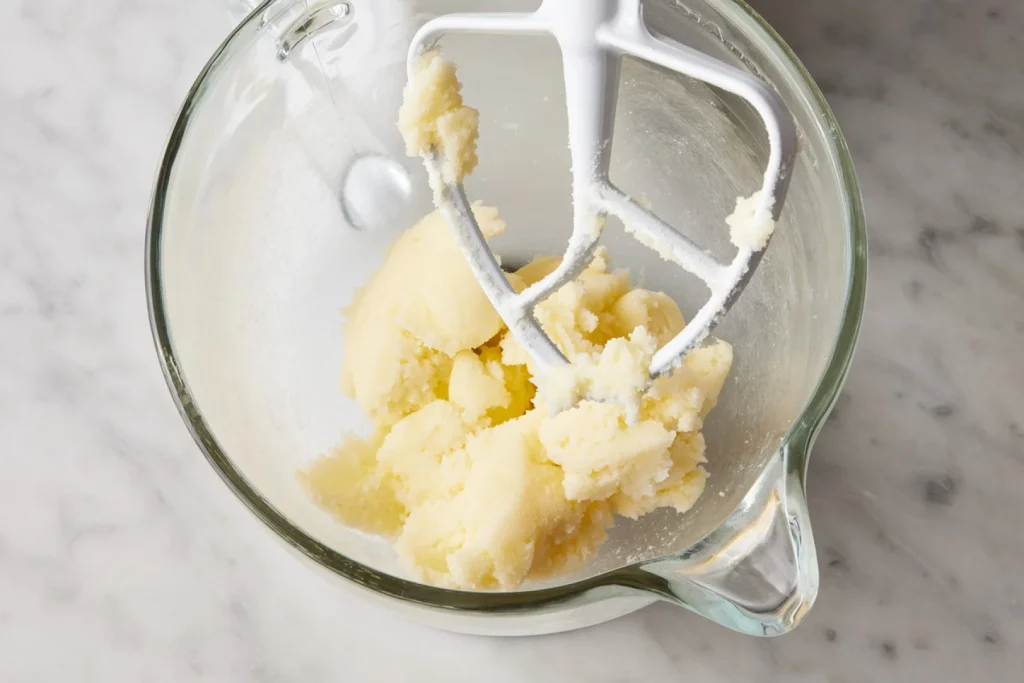
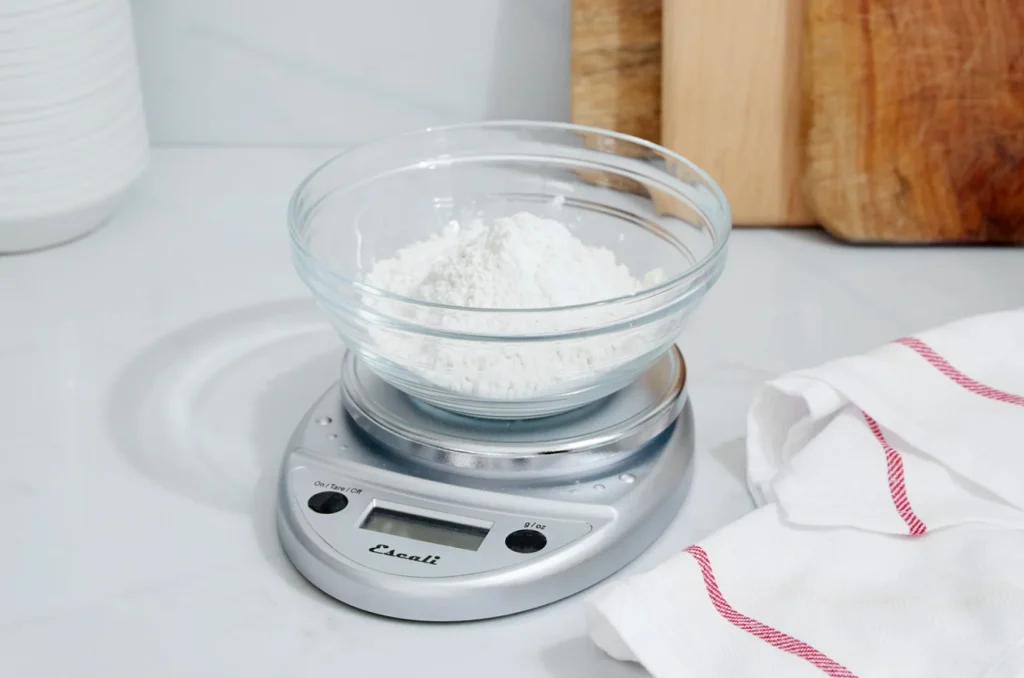
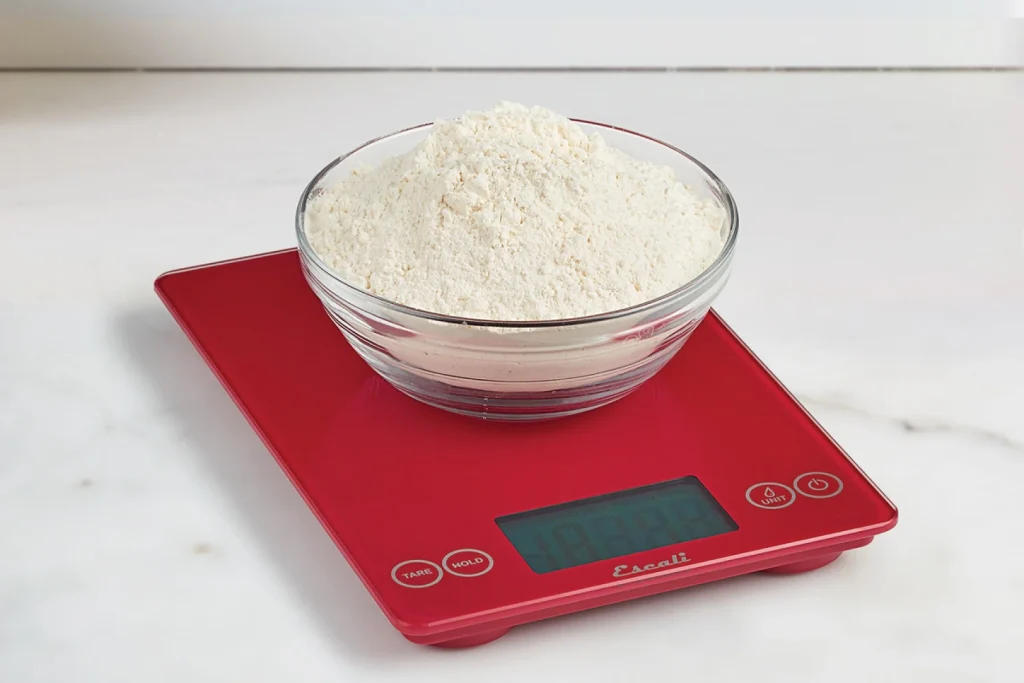
Add 2 tablespoons granulated sugar and bake for 2 to 4 extra minutes.

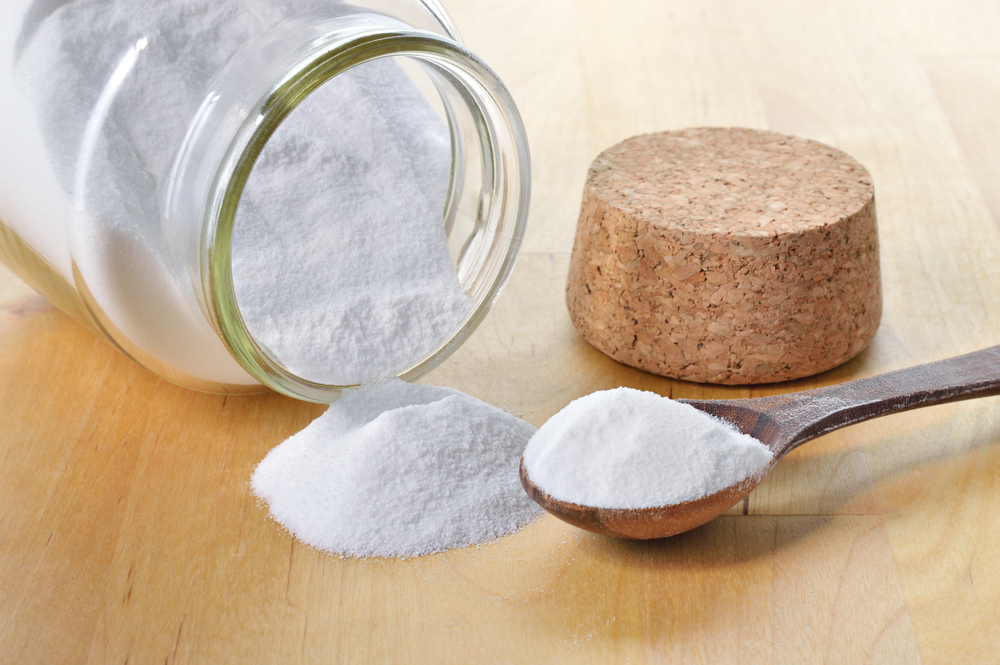
What does the extra sugar do to the cookie dough?

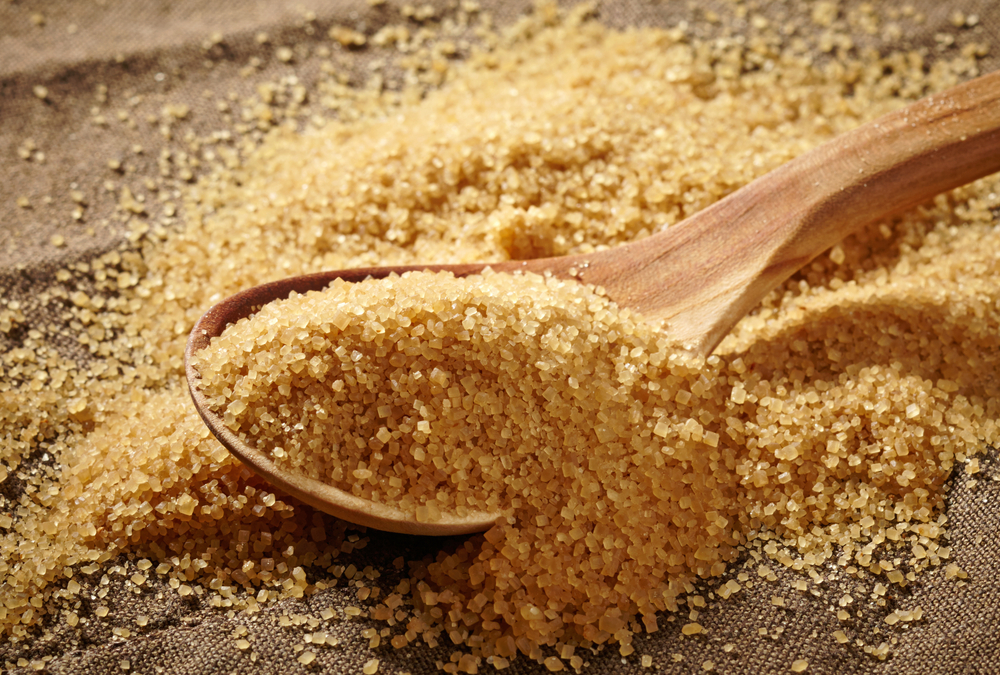
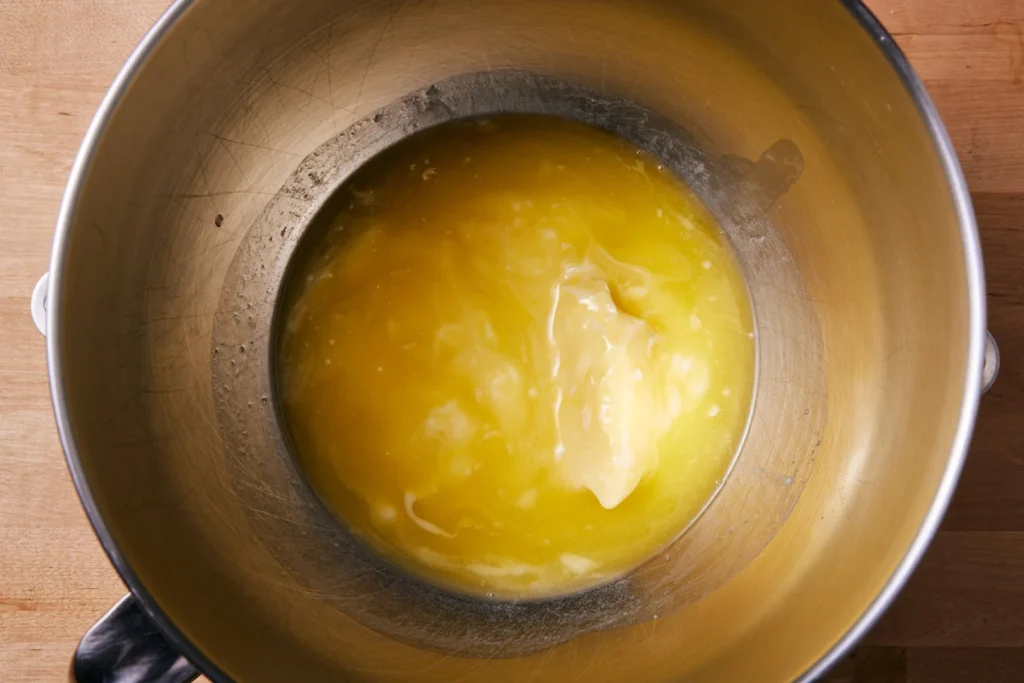
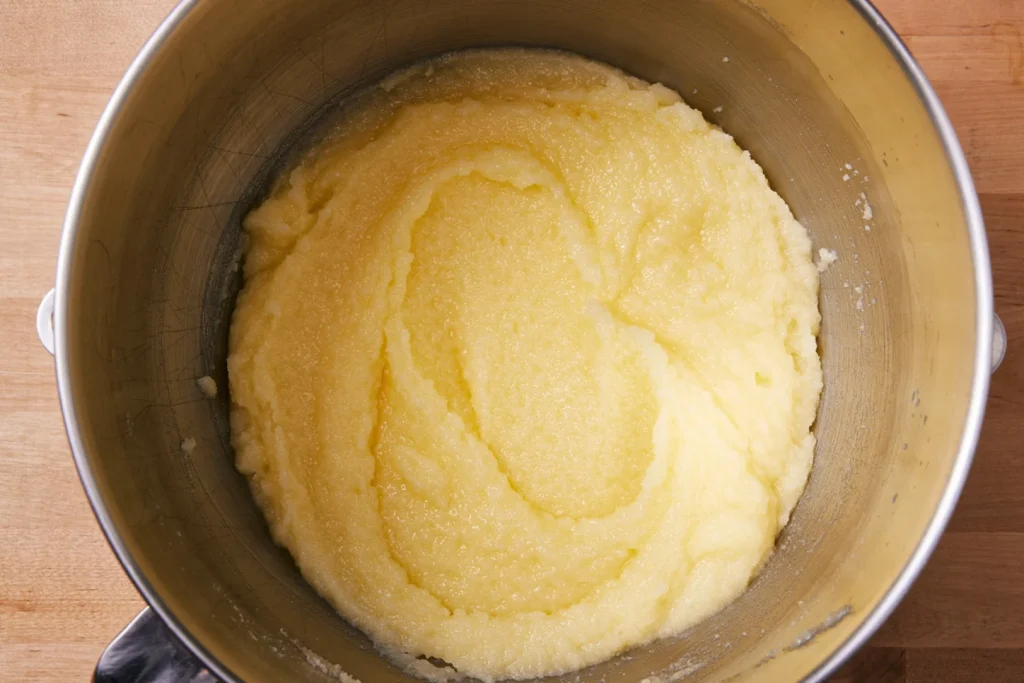
Although sugar may seem like a simple ingredient, it plays a very important and complex role in cookie dough. It contributes to both texture and flavor in many ways: It melts in the heat of the oven to increase spread, and it creates little air pockets in the dough to expand and make cookies rise. Sugar also caramelizes and participates in Maillard reactions to add both color and additional flavor notes, and it recrystallizes upon cooling to give the cookies crispy texture. (Maillard reactions are when amino acids react with sugars to give you the brown color and caramelized flavor in baked goods.)

When adding an extra few tablespoons of granulated sugar, you increase the ratio of sugar to fat and flour in the cookie. This will result in a bit more spread, a larger surface area and more material to caramelize and react and, of course, a little bit of extra sweetness as well, which never hurts.

You may notice that the cookies won’t be crispy immediately out of the oven; that happens later. While the exact science of cookie cooling is still somewhat of a mystery, one theory is that as the molten sugar retreats to its crystalline structure and solidifies, the cookie becomes crispy as opposed to bendy. Working with that theory, we can then understand why the more sugar present to recrystallize, the more snap your cookie will have.

How does granulated sugar act differently than brown sugar?

Granulated sugar contains little to no “invert sugar,” which is what you find in the molasses or refiners syrup added to brown sugar. This invert sugar is actually single monosaccharide molecules that were created by breaking down the double disaccharide molecules that make up granulated or table sugar (sucrose). These monosaccharides possess different chemical properties that make cookies chewier, as we’ll see in the tip below.

Why the different bake time?

By adding extra sugar, you can bake the cookies to a slightly higher temperature without over-baking, which will allow for a crispier final cookie as well as deeper flavor development.

Why not just bake any version longer to get a crunchy cookie without added sugar?

While it’s certainly true that baking any cookie longer will cause it to have a firmer final texture, having the extra granulated sugar allows the cookie to maintain a tender, “snappy,” crisp texture (due to the properties discussed above), as opposed to a less enjoyable hard/crunchy texture.

How to make chewy chocolate chip cookies

Add 2 tablespoons brown sugar.

What does extra brown sugar do to the cookie dough?

While brown sugar is similar to granulated sugar in many ways, it has one major functional component that granulated sugar does not: invert sugar!

The two primary invert sugar monosaccharides found in brown sugar are glucose and fructose, which are actually bound together to make the disaccharide sucrose — what Americans know as our standard white table sugar.

Compared to sucrose, invert sugars caramelize at a lower temperature, and absorb and retain more moisture; fructose is particularly hygroscopic, meaning it really loves to suck up and hold onto water.

Invert sugars also interfere with recrystallization upon cooling, which helps make cookies crisp. By holding that extra moisture and delaying the sugar’s recrystallization, brown sugar has the wonderful ability to give you a moist, bendy, chewy cookie.

Does it make the chocolate chip cookie extra sweet?

While a particularly perceptive taster might be able to tell the difference in sweetness with the additional two tablespoons brown sugar, the overall sweetness level only increased slightly. It’s really just a delightfully sweet cookie at either level.

Do light and dark brown sugar work the same?

In fact, they do. The differences between light and dark brown sugar in terms of the amount or types of syrup used are usually minimal, even though you might expect otherwise given the significant difference in coloration.

How to make cakey chocolate chip cookies

Add 2 tablespoons milk.

What does extra brown sugar do to the cookie dough?

Although it may seem obvious, the most important role extra milk plays is adding a little more liquid. As cookie dough is very low in hydration, that two tablespoons of milk have more of an impact here than in something with higher hydration, such as cake batter.

Milk is around 85% water — and that water will evaporate in the heat of the oven to form steam. This steam will migrate to air pockets created by the melting sugar grains.

As the steam gets hotter, it teams up with gases produced by the leaveners, expanding those air pockets. That expansion causes the cookies to puff and rise in the oven, creating an airy, cakey texture.

The moisture contributed by the milk will also increase spread and hydrate more of the starches in the flour. These hydrated (gelatinized) starches support the structure of the air pocket wall, keeping the cookies from collapsing once cooled. By holding more water, they also help keep the cookies softer over time.

Why milk and not water?

While milk is mostly water, those other little molecules in milk do serve a purpose. First, their presence means that there’s 15% less liquid being added to the dough, and this helps prevent the dough from spreading too far and turning into some less-than-ideal chocolate chip pancakes in the oven.

The proteins in milk — about 3% to 4% — will enhance Maillard reactions (as discussed above) and contribute many of the flavor notes that we recognize as “baked,” giving the cookies their roasted, toasted, and even sometimes nutty notes. Finally, the fat and sugar from the milk also add extra tenderness and richer flavor.

Sugar creamed with warm or melted butter is grainy and greasy.

If your butter is just right

Now that we’ve seen both extremes, let’s check out the results when the butter is at the right temperature. The mixture is lightened in color, it’s visibly fluffy, and it’s not clinging to the sides of the bowl.

Sugar creamed with room temperature butter is pale and fluffy.

Let’s look at the three results side by side. Starting on the left: too cold and the mixture sits in a lump. Too warm, and the mixture spreads out and has an oily layer. Finally, properly creamed, the mixture sits up tall and has visible fluffy peaks.

From left to right: sugar creamed with cold butter, warm butter, and room temperature butter.

Besides looks, the feel of each mixture will be different as well. Under-creamed and your mix will feel like wet sand or damp cornmeal. Over-creamed, and your mix will have the feel of oil and sugar on your fingers, rather like a facial scrub. Your well-creamed mix will be moist and light and the sugar will be nearly dissolved. You’ll barely feel any grit when you rub it between your fingers.

The right mixing speed and duration for creaming

Of course, having correctly softened butter is just one part of the equation, albeit a big one. Mixing at too high or too low a speed and for too short or long a time will also wreak havoc with your creaming. With the advent of the more powerful stand mixers that we use today, gone are the days of having to whip the butter and sugar mixture on high speed for several minutes to achieve good results. Instead, a moderate speed (typically speed 3 to 4 on a stand mixer) for 2 to 3 minutes is sufficient to get the aeration you’re looking for, being sure to scrape the bowl halfway through.

Under-creamed butter and sugar

If you under-cream your butter and sugar mixture, it will remain dense, grainy, and dark in color:

Under-creamed butter and sugar

If you under-cream your butter and sugar mixture, it will remain dense, grainy, and dark in color.

Correctly creamed butter and sugar

Perfectly creamed butter and sugar should be light, fluffy, and pale in color (but not white).

Perfectly creamed butter and sugar

Perfectly creamed butter and sugar should be light, fluffy, and pale in color (but not white).

Over-creamed butter and sugar

If you beat too long and hard, the mixture will be over-creamed, becoming nearly white in color. Because it’s too aerated, it can result in dense, gummy streaks in your cake when baking.

Over-creamed butter and sugar.

Unfortunately, if the butter and sugar has gone this far there’s no going back. We hope you’ve found this information helpful. A picture is worth a thousand words, they say, and we hope these photos and our video will help you achieve the cakes and bakes of your dreams.

Posted on Leave a reply

How to measure flour the right way

How to measure flour the right way

By: RedmanShop | January 22, 2025

If you learn one skill to bake better, it should be how to measure flour — the right way. It’s arguably one of the biggest keys to baking success. That’s because a little too much flour can be the difference between a good bake and a not-so-good bake. And if you’re measuring your flour by volume (i.e., with measuring cups), then it’s very likely you’re adding too much flour.

That’s because measuring flour by volume is wildly inconsistent: It all depends on how densely the flour is packed into the cup. If the flour is more condensed, a cup can hold up to 160 grams of all-purpose flour. If you fluff, scoop, and level, as we recommend, a cup will hold around 120 grams. But if you weigh your flour with a scale? You’ll always get exactly 120 grams of all-purpose flour per cup, precisely as our Test Kitchen (or whoever developed your recipe) intends.

If you succeed in correctly measuring your flour, your baked goods are more likely to be successful, too. And while we recommend always using a scale, using measuring cups works too if you do it the right way. However you choose to measure your flour, here’s how to get it right.

With a scale, your measurements are always accurate.

How to measure flour with a kitchen scale

Hit the “Tare” button to make sure your scale is set to 0 grams. (All of our recipes include gram and volume measurements.) Set your measuring bowl, or a separate empty bowl, measuring cup, or other vessel (whatever you’ll be pouring your flour into) onto the scale, then press “Tare” again to set the scale to 0 grams. Scoop your flour into the vessel on the scale — if you’re measuring 1 cup of all-purpose flour, keep scooping until the scale totals 120 grams. Or measure out however much flour the recipe calls for. (Wondering about the weight of other flours and ingredients? Check out our handy ingredient weight chart.)

Generally, you can stay within 5 grams over or under the written amount (for instance, if the recipe calls for 240 grams of flour and you measured out 245 grams), and it won’t affect your recipe. With that said, we recommend being as accurate as possible when measuring flour and all other ingredients.

How to measure flour with measuring cups

If you don’t have a scale and need to measure flour by volume, it’s important to use the correct technique. Using our “Fluff, Sprinkle, and Scrape” technique is the best way to make sure you do not add too much flour to your recipes.

Begin by fluffing your flour in its bag or container using a spoon or scoop. The goal here is to lighten and aerate the flour. Spoon the fluffed flour into your measuring cup until it’s overflowing. Use a straight edge (like the back of a butter knife or a bench knife) to evenly level off the top so the flour is even with the top of the measuring cup.

Posted on Leave a reply

Bulk fermentation, explained

Bulk fermentation, explained

By: RedmanShop | January 22, 2025

Bulk fermentation (also called the first rise or primary fermentation) is one of the most important steps of yeast bread baking. It begins right when mixing ends and lasts until the dough is divided and preshaped. The name signifies exactly what it is: the step when the dough is fermenting in a large, single mass.

During this time, fermentation creates organic acids and carbon dioxide gases, each of which plays an important part in dough development. Organic acids are primarily what give the dough flavor and strength (acids help condition the gluten network) and carbon dioxide gives the dough volume and lightness.

While our friendly yeast and bacteria are doing most of this work, the dough still benefits from a periodic check-in by the baker. We help regulate dough temperature and strength through a series of folds, and these check-ins also give us an opportunity to assess how the dough is progressing.

Why stretch and fold?

Folding helps add strength to bread dough through a very simple series of actions: stretch the dough out and over itself. This act of stretching and folding, which takes just a few moments, helps develop the gluten network in the dough. Each fold has a significant impact on dough strength.

Through folding, we’re also helping to regulate dough temperature throughout the entire bulk mass. This ensures the dough’s temperature is relatively even throughout — no cool or warm spots at the top or bottom.

And finally, at each set, we have a chance to handle the dough and gain a firsthand assessment on how it’s developing: is the dough sluggish because it’s cool in the kitchen? This means we might need to extend bulk fermentation. Is it strong enough for preshaping or does it need another set of folds? By interacting with the dough in this way, we have an opportunity to answer these questions and adjust course as necessary.

When should I stretch and fold?

This process works best when you perform a quick series of folds and then let the dough rest. In the left-hand image below, you can see the dough bunched tightly in the center after performing a set of stretches and folds. In the right image, you can see it relaxed after a 30-minute rest, ready for another set of folds.

If you try to perform another set too soon, you’ll find the dough is too tight. It’ll be hard to stretch and may even tear. For most doughs, I find spacing out each set by 30 minutes (with the first set happening 30 minutes after the beginning of bulk fermentation) to be just right.

How to fold bread dough

There are many ways to fold bread dough, but my preference is to perform them directly in the bowl. First, get a small bowl filled with water and place it next to your bulk container. Dip your hands in the water before folding to prevent excessive sticking.

You will perform the same up-and-over motion four times, turning the bowl after each fold. As shown above, use two wet hands and grab the side of the dough farthest from you, then lift it up and over to the side nearest your body. Next, rotate your container 180°, wet your hands again if necessary, and perform the same stretch and fold. Next, rotate your container 90°. Grab the side of the dough farthest from you; once again stretch it up and over to the side of the container nearest your body. Rotate your bowl 180° and perform the same fold one final time.To finish the set, I like to gently pick the dough up in the center and let the ends fold under just a little. This helps keep the dough tidy in the middle.

When to end bulk fermentation?

Finding the exact point when to end bulk fermentation takes practice. With time, you’ll learn to read the signs of sufficient fermentation: dough strength, elasticity, smoothness, volume gain, and bubbly appearance.But making this call can be difficult. Cutting bulk fermentation short might mean your dough won’t be sufficiently fermented and you’ll head toward an under-proofed result. On the other hand, if you push bulk fermentation too far, your dough will be hard to handle and on the verge of over-proofing. There’s a balance to be found.Upper left: dough at the beginning of bulk fermentation. Upper right: dough before first stretch and fold. Lower left: dough before second stretch and fold. Lower right: dough at the end of bulk fermentation.

In the image above, see how it initially starts as a shaggy mass, but eventually rises significantly and becomes smooth, strong, and bubbly?At the end of bulk fermentation, I look for a dough that’s risen significantly and is much smoother than when bulk started. If you tug on the dough a little with a wet hand, you’ll feel resistance and elasticity.Additionally, look for liveliness. Gently shake the bowl and it’ll jiggle, letting you know there’s plenty of aeration in the dough. These are all great signs that the dough has fermented sufficiently and is strong enough to be divided.Strong fermentation, sufficient dough strength, ending bulk fermentation at the right time, and a full proof – these are all steps required for a wonderful loaf of bread. And as you develop a sense for how to execute on each of these, you’ll taste the difference in every bite.

Posted on Leave a reply

Cake flour vs. all-purpose flour: What’s the difference?

Cake flour vs. all-purpose flour: What’s the difference?

By: RedmanShop | January 13, 2025

“I want to make a recipe that calls for cake flour, but all I have is all-purpose flour. Can I substitute all-purpose for cake flour?”

If you’ve ever asked this question — to yourself or a friend — you’re not alone. Sometimes we just don’t have the flour a recipe calls for (and can’t bear another trip to the store), or maybe the store was out of stock. So how much does flour choice affect your baking?

The difference between cake flour and all-purpose flour

First, it helps to understand the difference between cake flour and all-purpose flour.

It all comes down to protein content. Every type of flour has a protein percentage, which reflects how much gluten-forming protein it contains. Because protein level correlates with gluten-forming potential, it’s helpful to think of it this way: the higher the protein content, the “stronger” the flour.

When making baked goods like bread, using a strong flour with high protein makes sense. The robust glutinous web that develops when the flour is combined with liquid results in bread with chewy, bouncy texture. But when making a cake, it’s the opposite: We want something with a soft, fine, and tender crumb. In order to get it, we want to discourage gluten development, and one way to do that is to choose a flour with a lower protein content (the other is to avoid overmixing, which further develops gluten, even if you are using cake flour).

Our unbleached cake flour has a protein content of 10%, while all-purpose flour has a protein content of 11.7%. The lower protein content in cake flour means it has less gluten-forming potential, making it better suited to cakes.

(And it’s not just for cake! Our Test Kitchen uses lower-protein cake flour to achieve a melt-in-your-mouth texture in cookies like these Fiori Thumbprint Meltaway Cookies, while these Lemon Sugar Crunch Buns include cake flour for a delicate crumb.)

How to substitute for cake flour

You can make your own cake flour substitute by combining all-purpose flour with a little bit of cornstarch. The cornstarch adds tenderness and lowers the overall protein content of the mixture to mimic that of cake flour.

How to make cake flour : Whisk together 3/4 cup + 2 tablespoons (105g) all-purpose flour and 2 tablespoons (14g) cornstarch. Use in place of cake flour in a recipe, substituting by equal weight or volume.

Can I substitute cake flour for all-purpose flour?

While it’s usually fine to substitute all-purpose flour for cake flour, the opposite isn’t true. “For those bakers out there thinking ‘flour is flour’ — no, it’s really not!” says Molly. She explains, “Subbing cake flour 1:1 into a recipe that was developed for all-purpose flour might result in sunken cake or bars, or cookies that are too delicate or simply fall apart.” That’s because the lower protein content in cake flour may not develop enough gluten or structure to support a baked good meant to be made with all-purpose flour.

To live up to its name, Tender White Cake is made with cake flour.

Start baking with cake flour

Ready to bake great cake? Pick up a box of cake flour and make some of our favorite cake flour recipes:

Posted on Leave a reply

How to assemble and frost a layer cake

How to assemble and frost a layer cake

By: RedmanShop | January 12, 2025

Frosting a cake can be intimidating, but if you break it down step-by-step, there’s nothing to fear. The right tools and techniques will guide you, taking you from naked layers to a frosted beauty without breaking a sweat. The key is to take your time and embrace imperfection. You’ve got this.

Patience makes perfect. Take the time to chill or freeze your baked layers before assembling the cake. The layers will be less fragile, and you’ll have more control and better results with frosting. While they’re chilling, line your serving plate with 2″ to 3″ wide strips of parchment paper.

Trim any dome from the top of the first layer so the cake is flat, then flip it over and place it on your serving plate cut side down.

Pipe a rope of frosting around the outside edge of the cake layer. Refrigerate for 15 minutes so it will become firm. This “dam” keeps frosting or filling from bulging out the side of the finished cake. After the dam sets, fill the top of the layer.

Trim the next layer and place it cut side down over the first. Chill the cake again, if it isn’t cool to the touch.
Smear a very thin coat of frosting on the sides and top of the cake.

This is called the crumb coat. It’s fine if it looks messy, and crumbs are showing through. Refrigerate the cake until you can touch the crumb coat without leaving a fingerprint, 20 to 30 minutes.

Once the crumb coat is firm, cover the top and sides of the cake with a finish coat of frosting. Gently remove the parchment paper strips. Decorate and embellish to your heart’s content.

Posted on Leave a reply

A breakdown of all the different cake mixing methods

A breakdown of all the different cake mixing methods

By: RedmanShop | January 12, 2025

There are so many ways to mix up cake batter. Maybe you’ve always wondered why the many methods; maybe you never thought about it until now. But each technique is based on specific ingredients, and results in a different final product: from a light as air cake, to one that’s sturdy enough to hold up in wedding tiers.

Common ways you might see cake mixing methods written in a recipe:

  • “Cream the butter and sugar together.”
  • “Combine dry ingredients. Add butter and mix until it resembles sand.”
  • “Put all of the ingredients in a bowl and stir together.”

Which way is “best”?

Cake mixing methods

We’ve recently baked cakes using six of the top mixing methods. Read on to see just how different cake results can be, depending on the steps in which the batter is blended.

1) Blended

Cakes made with this method: Very moist; a great candidate for adding mix-ins.

Basically stir together and go, the blended method is the easiest of all cake-prep types. Blended cakes are typically made with oil rather than butter, since oil is much more easily incorporated with the rest of the ingredients. Blended cake batter tends to be more liquid than most; oftentimes the recipe will call to “pour” the batter into the pans, rather than scoop.

2) Creaming

Example: Lemon Bliss Cake Cakes made with this method: Sturdy, yet soft textured. Easy to slice and stack in layers; also ideal for Bundt pans. This cake mixing method is a classic, and the most common.

The creaming method starts with beating the butter and sugar together until they’re lightened in color and fluffy.

Eggs are beaten in one at a time.

The creaming method then adds the dry and liquid ingredients alternately to the butter mixture.

The usual method is a third of the flour, half the milk, a third of the flour, the remaining milk, and finally the remaining flour; it’s helpful to scrape the bowl midway through this process.

Adding flour and liquids alternately ensures all the liquid (usually milk) will be thoroughly absorbed into the batter. If there’s a high amount of butter or other fat in the batter, it’s hard to get the liquid totally mixed in; the alternating technique helps reduce the percentage of fat overall (by adding some flour first). It also facilitates the formation of gluten, which binds the batter together.

3) Foam

Example: Angel Food Cake

Cakes made with this method: Extremely light and airy. This high-rising, somewhat “resilient” cake slices best with a serrated knife or pronged angel food cutter. The leanest cake in the bunch, foam cakes contain little to no fat: i.e. no butter or shortening, and no egg yolks.

Like some sponge cakes, foam cakes contain no leavening, depending on air whipped into the egg whites for structure. The whites are whipped into stiff peaks, usually with cream of tartar added to help with stability and volume.

Flour is carefully folded in, leaving as much air in the batter as possible. Most choose to fold in the flour with a spatula, but we’ve found that using the whisk attachment (the one that just moments before whipped up those whites) incorporates it easily and gently.

4) Paste (also called reverse creamed)

Example: Golden Vanilla Cake

Cakes made with this method: Tighter textured, though still moist. A great candidate for tiers. The most sturdy of the cakes; slices with minimal crumbs. This moist and tender (yet sturdy) cake is an American favorite. Its slightly denser crumb makes it perfect for frosting as a layer cake. Making a cake using the paste method (also sometimes called “reverse creaming”) sounds complicated, but it’s actually one of the most simple techniques of the bunch.

Soft butter and room-temperature liquids are beaten into the dry ingredients until the texture is “sandy.” The butter-coated flour slows the formation of gluten (which starts once flour comes in contact with liquid), and results in a slightly more sturdy cake that still offers soft texture.

Once the batter reaches that crumbly, sand-like consistency, milk and any flavors are added. Then eggs are mixed in one by one. The batter, though pourable, is often thicker than other cake batters.

5) Sponge

Example: Chef Zeb’s Hot Milk Cake

Cakes made with this method: Light and airy, with soft texture. Tend to compress slightly when stacked over two layers high. Mildly sweet, sponge cakes are high-rising and light as air, with the perfect degree of moistness.

Sponge cakes can be made different ways. One way is beating egg yolks and sugar (or whole eggs and sugar) until a very thick foam-like batter is created. The batter is pale yellow in color, and falls off the beater in ribbons. Flour is then gently folded in. Another way is to whip the egg whites separately from the yolks until soft peaks form. The yolk/sugar mixture is beaten until light, flour is mixed in, and then egg whites are gently folded into that mixture. Either way the eggs are prepared, they provide leavening and loft for the sponge cake. This method dates back to before the widespread use of baking soda or powder, when trapped air was a cake’s only leavening.

The batter for sponge cake is very light, airy, and almost soup-like in consistency. Though it may be alarming, this is totally normal. It will bake up into the moist, delicious cake that we know as sponge.

6) Gluten-free

Example: Strawberry Almond Flour Cake

Gluten-free cakes can be made any number of ways and with great success, much like their wheat-y counterparts. As with all recipes, be sure to read the directions carefully before starting. All puns intended, these methods really take the cake. Each one will create a totally different finished baked good – all equally delicious. Tell us, which of these cake-mixing methods do you usually use?

Want to take a deeper dive into cake baking? See our complete guide to cake and cupcakes.

Subscribe to our Newsletter Now

Get the latest recipes, products and classes available on RedManShop.